# Setting up the GitHub integration
This section explains how to set up GitHub and SonarQube for their integration at the global level. You need the global Administer System permission in SonarQube to perform this setup.
## Verifying that the SonarQube server URL is correctly set
If the URL of your SonarQube server is not configured then the quality gate status report to your pull requests will not work correctly (the issues in GitHub will not be linked to their counterparts in SonarQube).
To verify the server URL:
* Go to **Administration > Configuration > General Settings > General > General** and set the instance’s **Server base URL**.
## Setting up the import of your GitHub repositories to SonarQube
You need to use a GitHub App to connect SonarQube with GitHub and import your GitHub repositories into SonarQube. This is also the first step in adding authentication, and, starting in [Developer Edition](https://www.sonarsource.com/plans-and-pricing/developer/), the first step in reporting your analysis and quality gate status to your pull requests.
If you want to set up authentication without importing your GitHub repositories, see [github](https://docs.sonarsource.com/sonarqube-server/10.5/instance-administration/authentication/github "mention") for instructions on setting up authentication.
In this section, you’ll complete the following steps to connect SonarQube and GitHub with a GitHub App:
1. Register SonarQube as a GitHub App.
2. Install your GitHub App in your organization.
3. Update your SonarQube global settings with your GitHub App’s information.
### Step 1: Registering SonarQube as a GitHub App
See GitHub’s documentation on [registering a GitHub App](https://docs.github.com/en/apps/creating-github-apps/registering-a-github-app/registering-a-github-app) for general information on GitHub Apps.
Specify the following settings in your app:
* **GitHub App Name**: Your app’s name.
* **Homepage URL**: You can use any URL, such as `https://www.sonar.com/`.
* **User authorization callback URL**: Your instance’s base URL. For example, [`http://sonarqube.yourcompany.com`](http://sonarqube.yourcompany.com)[.](https://yourinstance.sonarqube.com) Note that for this to work, your SonarQube instance must be accessible through a public URL.
* **Webhook URL**: To improve security, webhooks, by default, are not allowed to point to the SonarQube server since version 8.9LTS, therefore we recommend that you disable the feature. Unless you want to enable code scanning alerts for security vulnerabilities in GitHub, you should clear the **Webhook Active** checkbox to silence a forthcoming deprecation warning, and clear the **Webhook URL** and **Webhook secret** fields when creating your GitHub App.
* Grant access for the following **Repository permissions**:
| | |
| -------------------------------------------------------------------------------------------------------------------------------------------------------- | ------------ |
| **Permission** | **Access** |
| Checks | Read & write |
| GitHub Enterprise: Repository metadata
GitHub.com: Metadata
(this setting is automatically set by GitHub)
| Read-only |
| Pull Requests | Read & write |
* For private repositories, grant access to the following **Repository permissions**:
| | |
| -------------- | ---------- |
| **Permission** | **Access** |
| Contents | Read-only |
* And grant access for the following **Organization permissions**:
| | |
| -------------- | ---------- |
| **Permission** | **Access** |
| Members | Read-only |
| Projects | Read-only |
* If setting up **GitHub Authentication**, in addition to the aforementioned Repository permissions, grant access for the following **Account permissions**:
| | |
| --------------- | ---------- |
| **Permission** | **Access** |
| Email addresses | Read-only |
* Under "Where can this GitHub App be installed?" select **Any account**.
{% hint style="warning" %}
For security reasons, make sure you’re using `HTTPS` protocol for your URLs in your app.
{% endhint %}
### Step 2: Installing your GitHub App in your organization
Next, you need to install your GitHub App in your organization. See GitHub’s documentation on [installing GitHub Apps](https://docs.github.com/en/free-pro-team@latest/developers/apps/installing-github-apps) for more information.
### Step 3: Updating your SonarQube global settings with your GitHub App information
After you’ve registered and installed your GitHub App, update your global SonarQube settings to finish integration and allow for the import of GitHub projects:
Navigate to **Administration** > **Configuration** > **General Settings** > **DevOps Platform Integrations** > **GitHub** and specify the following settings:
* **Configuration Name** (Enterprise and Data Center Edition only): The name used to identify your GitHub configuration at the project level. Use something succinct and easily recognizable.
* **GitHub URL**: For example, `https://github.company.com/api/v3` for GitHub Enterprise or `https://api.github.com/` for GitHub.com.
* **GitHub App ID**: The App ID is found on your GitHub App’s page on GitHub at **Settings** > **Developer Settings** > **GitHub Apps**.
* **Client ID**: The Client ID is found on your GitHub App’s page.
* **Client secret**: The Client secret is found on your GitHub App’s page. Administrators can encrypt this secret at **Administration** > **Configuration** > **Encryption**. See [#settings-encryption](https://docs.sonarsource.com/sonarqube-server/10.5/instance-administration/security#settings-encryption "mention") for more information.
* **Private Key**: Your GitHub App’s private key in PEM format. You can generate a `.pem` file from your GitHub App’s page under **Private keys**. Copy and paste the whole contents of the file here. Administrators can encrypt this key at **Administration** > **Configuration** > **Encryption**. See [#settings-encryption](https://docs.sonarsource.com/sonarqube-server/10.5/instance-administration/security#settings-encryption "mention") for more information.
## Setting up SonarQube user provisioning and authentication through GitHub
See [github](https://docs.sonarsource.com/sonarqube-server/10.5/instance-administration/authentication/github "mention").
## Setting up the display of SonarQube security alerts in GitHub
Starting in Developer Edition, SonarQube can provide feedback about security vulnerabilities inside the GitHub interface itself. The security vulnerabilities found by SonarQube will appear in both:
* The SonarQube interface, as part of the displayed analysis results.
* The GitHub interface, as code scanning alerts under the **Security** tab.
Note: This feature is part of the [GitHub Advanced Security package](https://docs.github.com/en/get-started/learning-about-github/about-github-advanced-security) and is currently free for public projects. It is available as a paid option for private projects and GitHub Enterprise. This option is entirely on the GitHub side. Sonar does not charge anything extra to enable the code scanning alerts feature.
Before you can configure GitHub code scanning alerts for vulnerability issues, you must first import your GitHub repository to SonarQube as explained above.
Once you’ve enabled this feature, you must run a SonarQube analysis to see your security vulnerabilities as GitHub code scanning alerts.
### Configuring GitHub
1. Go to **Settings** > **Developer settings** > **GitHub Apps** and select your GitHub App.
2. Go to the **General** > **Webhook** section and make sure to select the **active** checkbox.
3. Add the following Webhook URL: `https://.sonarqube.com/api/alm_integrations/webhook_github`. Replace `.sonarqube.com` with your SonarQube instance.
4. Set a **Webhook secret** (see [GitHub’s webhook security recommendations](https://docs.github.com/en/developers/webhooks-and-events/webhooks/securing-your-webhooks)).
5. Under **Permissions & events** > **Repository permissions** > **Code scanning alerts**, set the access level to **Read and write**. When you update this permission, GitHub sends an email to the GitHub organization’s administrator, asking them to validate the changes on the installation of the GitHub App.
6. Under **Permissions & events** > **Subscribe to events**, select **Code scanning alert**.
### Configuring SonarQube
1. In your SonarQube project, go to **Administration** > **DevOps Platform Integrations** > **GitHub**.
2. Click on your GitHub App and select **edit**.
3. Enter the webhook secret defined in your GitHub App.
You can now analyze a project in SonarQube and check that the detected vulnerability issues are displayed on the GitHub interface, under your repository’s **Security** > **Code scanning alerts** tab.
Select **View alerts** to see the full list:
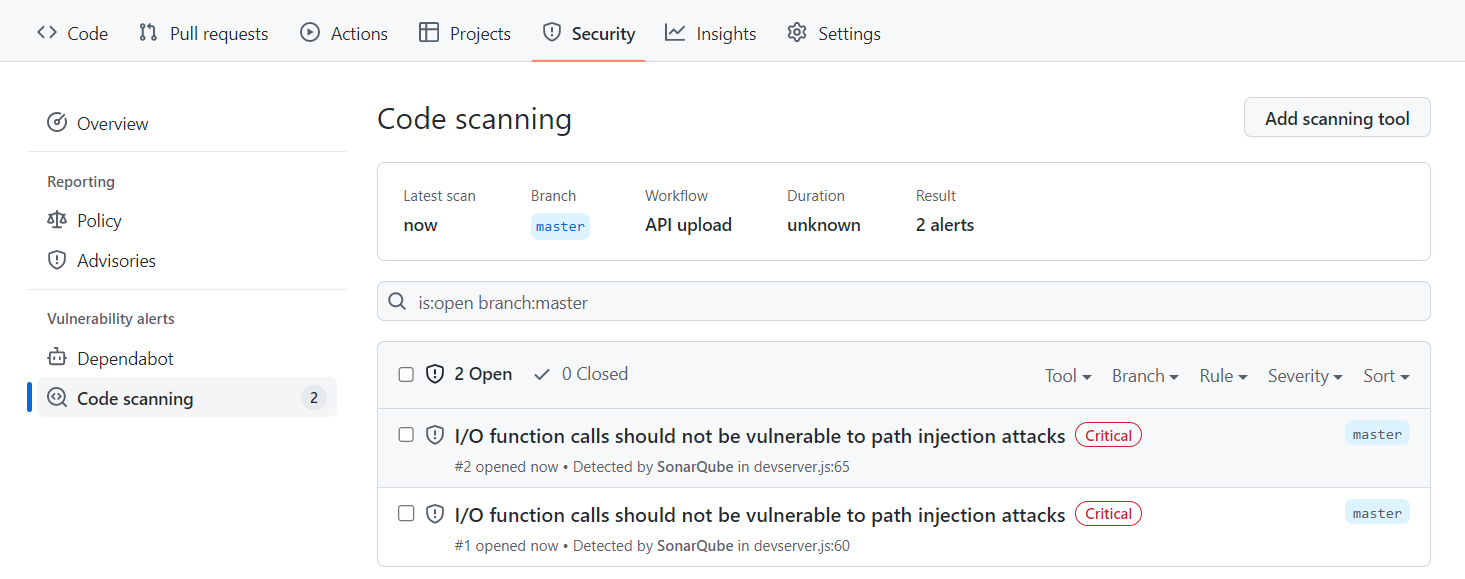
github code scanning alerts for sonarqube
### Managing access to security alerts
In GitHub, you can [configure access to security alerts for a repository](https://docs.github.com/en/repositories/managing-your-repositorys-settings-and-features/enabling-features-for-your-repository/managing-security-and-analysis-settings-for-your-repository) to enable and disable security and analysis features.
### About synchronized status changes
When you change the status of a security vulnerability in the SonarQube interface, that status change is immediately reflected in the GitHub interface.
For example, if you change an issue from *Open* to *Resolve as false positive* in SonarQube:

sync github code scanning alert in sonarqube
That change is reflected in the code scanning alert in GitHub as shown here:
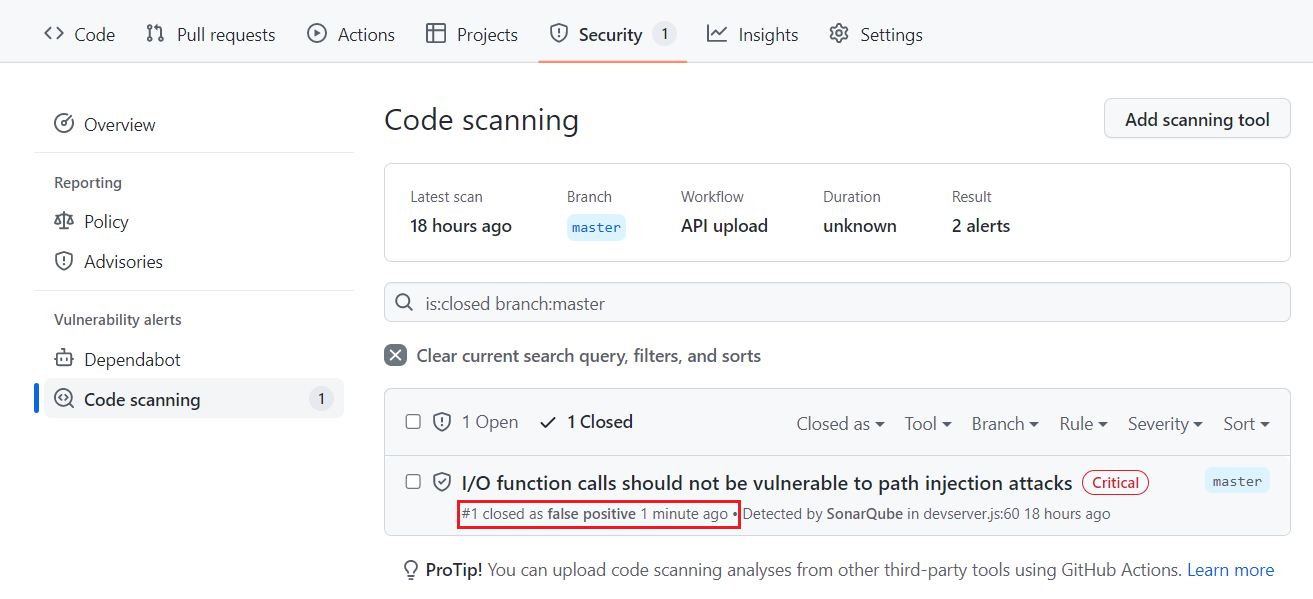
change in github code scanning alert for sonarqube
Similarly, if you change an issue from *Open* to *Dismiss: Won’t Fix* in GitHub, that change is reflected in SonarQube.
### Correspondence of statuses
Initially, all issues marked **Open** on SonarQube are marked **Open** on GitHub. Because the available statuses on the two systems are not exactly the same, the following logic is used to manage the transitions.
| | |
| ---------------------------------- | ------------------------------ |
| **In SonarQube, a transition to**: | **Results in this On GitHub**: |
| Confirm (deprecated) | Open |
| Fixed | Open |
| Accept | Dismiss: Won’t Fix |
| False Positive | Dismiss: False positive |
| Open | Open |
| | |
| ------------------------------- | --------------------------------- |
| **On Github, a transition to**: | **Results in this in SonarQube**: |
| Dismiss: False positive | False Positive |
| Dismiss: Used in tests | Accept |
| Dismiss: Won’t fix | Accept |
## Configuring multiple GitHub instances
SonarQube can report the analysis’ quality gate status to multiple DevOps platform instances. To do this, you need to create a configuration for each DevOps Platform instance and assign that configuration to the appropriate projects.
* As part of [Developer Edition](https://www.sonarsource.com/plans-and-pricing/developer/), you can create one configuration for each DevOps Platform.
* Starting in [Enterprise Edition](https://www.sonarsource.com/plans-and-pricing/enterprise/), you can create multiple configurations for each DevOps Platform.
---
# Agent Instructions: Querying This Documentation
If you need additional information that is not directly available in this page, you can query the documentation dynamically by asking a question.
Perform an HTTP GET request on the current page URL with the `ask` query parameter:
```
GET https://docs.sonarsource.com/sonarqube-server/10.5/devops-platform-integration/github-integration/setting-up-global-integration.md?ask=
```
The question should be specific, self-contained, and written in natural language.
The response will contain a direct answer to the question and relevant excerpts and sources from the documentation.
Use this mechanism when the answer is not explicitly present in the current page, you need clarification or additional context, or you want to retrieve related documentation sections.