Creating and configuring your Azure DevOps project
Creating your project by importing an Azure DevOps repository.
Once the Setting up Azure DevOps integration at global level with Azure DevOps is complete, you can create your SonarQube Server project by importing your Azure DevOps repository. You can also create it manually but you won’t benefit from the integration features.
It’s highly recommended to create your SonarQube Server project before running your first analysis. Creating the project from the first analysis has side-effects (e.g., you can’t choose the main branch name).
Before your first repository import
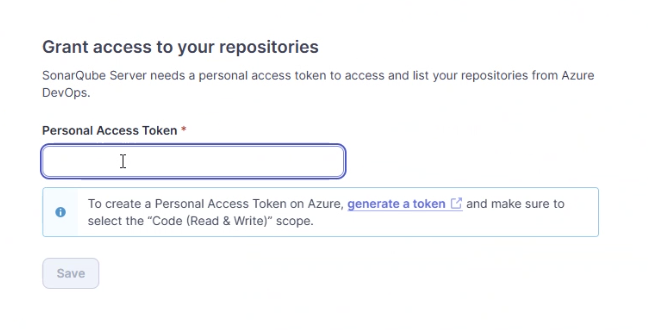
On your first repository import, you will have to insert an Azure Personal Authentication Token (PAT) so that you are able to list the repositories you have access to in Azure DevOps.
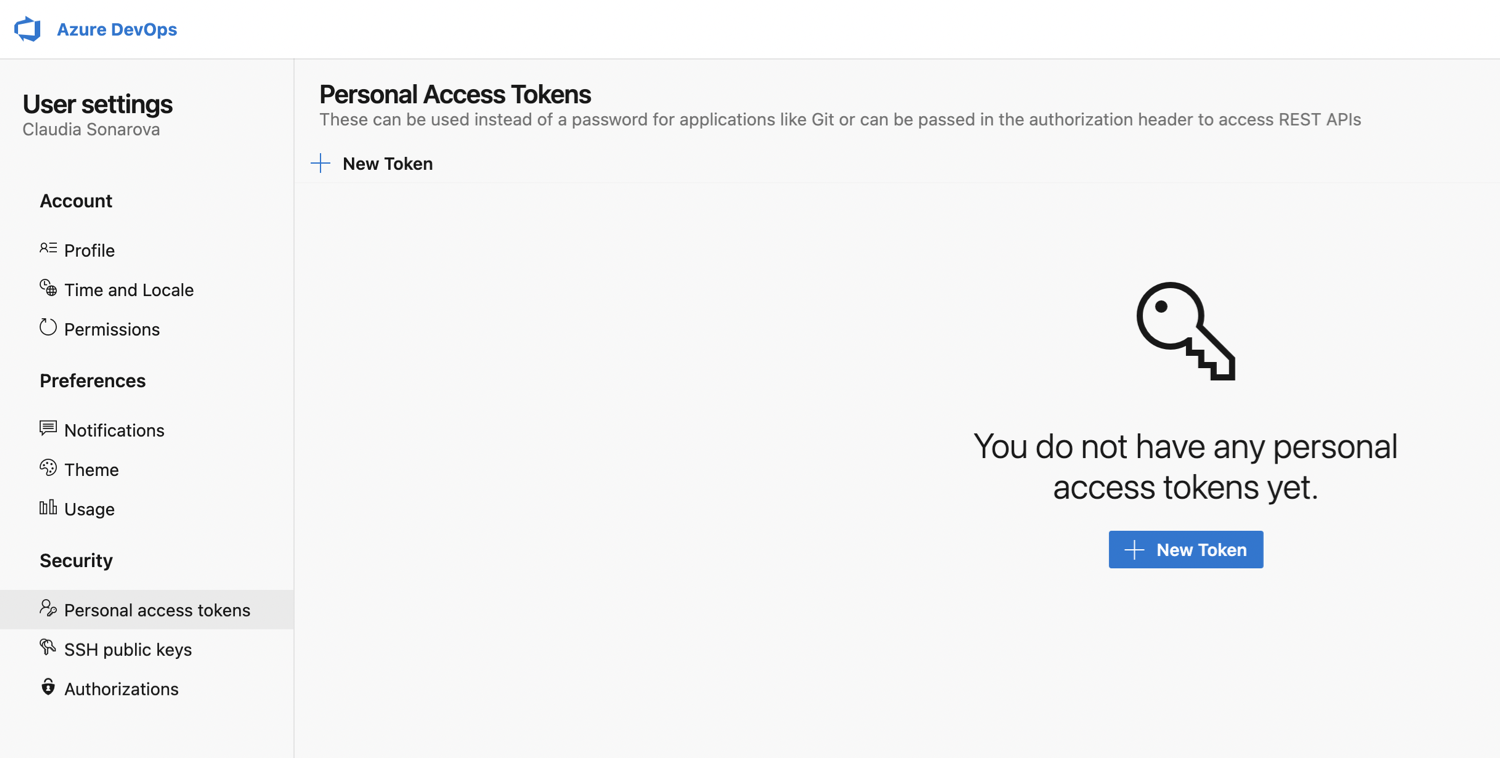
Proceed as follows to create your Azure PAT:
1. Log in to Azure DevOps.
2. Go to your Azure DevOps organization User settings > Personal access tokens and select + New token.

3. On the next page, under Scopes, make sure that you specify at least the scope Code > Read.
4. Click Create to generate the token.
5. When the personal access token is displayed, copy it (you will have to paste it during your first repository import as described below). You may ask your administrator to encrypt this token. See Sensitive settings for more details.
Importing your Azure DevOps repository
To import your repository, you need the Create Projects permission in SonarQube Server.
The so-created SonarQube Server project is "bound" to its Azure DevOps repository. With a bound project:
You can see in the SonarQube Server UI with which repository the project is associated.
You benefit from pull request integration features.
To import an Azure DevOps repository into SonarQube Server:
In the top navigation bar of SonarQube Server, select the Projects tab.
In the top right corner, select the Create Project > From Azure DevOps button.
If it’s your first repository import, you’ll be prompted to enter the Azure PAT you created as described in Before your first repository import above. Enter your PAT and select Save.

4. If your instance has multiple Azure DevOps Integrations, select the Azure DevOps configuration from which you want to import your project.
5. Select the repository to be imported.
Importing a monorepo
Starting in Enterprise edition, you can import an Azure DevOps monorepo. See Managing monorepo projects.
Creating your SonarQube Server project manually
You need the Create Projects permission in SonarQube Server.
Proceed as follows:
In the top navigation bar of SonarQube Server, select the Projects tab.
In the top right corner, select the Create Project > Local Project button.
Configuring the project analysis parameters
You can configure analysis parameters at different levels:
In your build environment.
In the
sonar-project.propertiesfile.In SonarQube Server UI.
At the Azure pipeline level. Parameters set at the pipeline level have precedence over parameters set at other levels.
For general information on setting up analysis parameters at the global and project levels, see Analysis parameters and the respective SonarScanner section: SonarScanner for Maven, SonarScanner for Gradle, Configuring the scanner, or SonarScanner CLI.
Related pages
Setting up Azure integration for your project at the project level
Introduction to adding analysis to your Azure build pipeline
Was this helpful?

