# Jira Cloud integration
See [jira-integration](https://docs.sonarsource.com/sonarqube-server/project-administration/jira-integration "mention") on a project level for more information about connecting your SonarQube projects with Jira Cloud projects.
## Prerequisites
### Permissions
To set up your Jira Cloud integration for your SonarQube Server instance, you will need the **Administer System** permission. To set this permission, go to **Administration** > **Security** > **Global permissions** and select the **Administer System** checkbox for specific users or groups.
To set up a new OAuth (3LO) integration app in Atlassian, you will need to be the administrator for your Jira Cloud organization. See [#pre-binding-steps-in-atlassian](#pre-binding-steps-in-atlassian "mention") for more information.
To connect SonarQube Server to Jira Cloud, your instance of SonarQube Server needs to be able to see the appropriate [Atlassian domains](https://support.atlassian.com/organization-administration/docs/ip-addresses-and-domains-for-atlassian-cloud-products/). This means these domains might need to be added to a firewall allow list or similar. /link
### Server base URL
For the Atlassian app authorization to work properly, your SonarQube Server's base URL must use HTTPS. It means that your instance should be secured behind a proxy. For more information, see [securing-behind-proxy](https://docs.sonarsource.com/sonarqube-server/server-installation/network-security/securing-behind-proxy "mention").
In addition, the **Server base URL** has to be configured on your SonarQube Server instance. For more information, see [server-base-url](https://docs.sonarsource.com/sonarqube-server/instance-administration/server-base-url "mention").
## Pre-binding steps in Atlassian
Before you can bind your SonarQube Server instance with Jira Cloud you need to create and set up a new OAuth (3LO) integration app in the Atlassian developer console. These steps should be performed by your Jira Cloud organization’s administrator.
{% stepper %}
{% step %}
#### Log into Atlassian developer console
1. Go to [developer.atlassian.com](https://developer.atlassian.com/) and sign into your account. If you don’t have an account, create one.
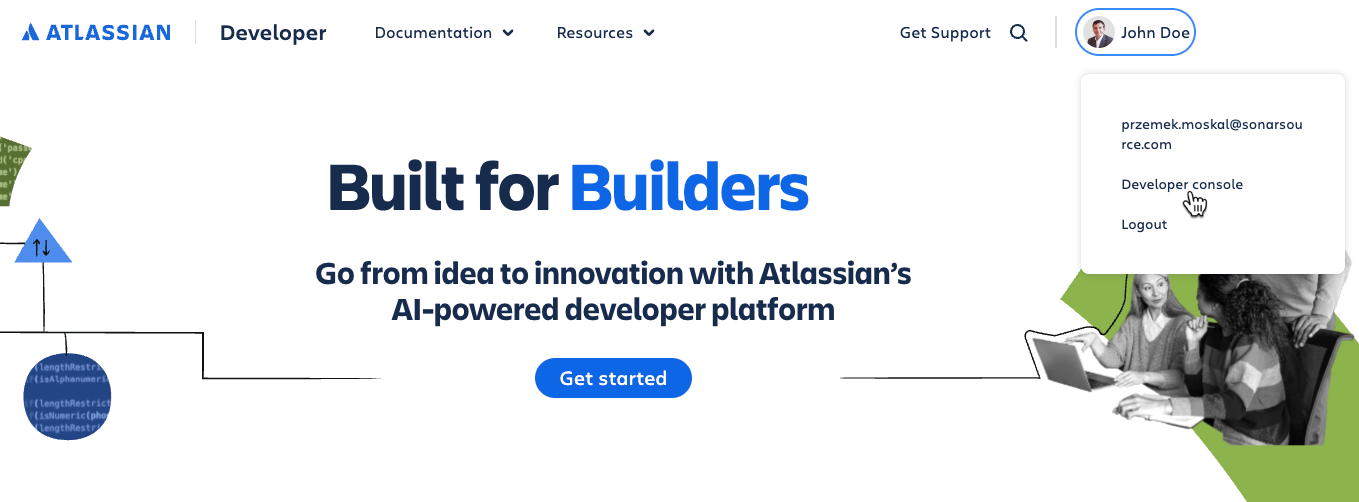
2. Click on your account in the upper right corner of the page and select **Developer console**.
{% endstep %}
{% step %}
#### Create an OAuth 2.0 (3LO) integration app
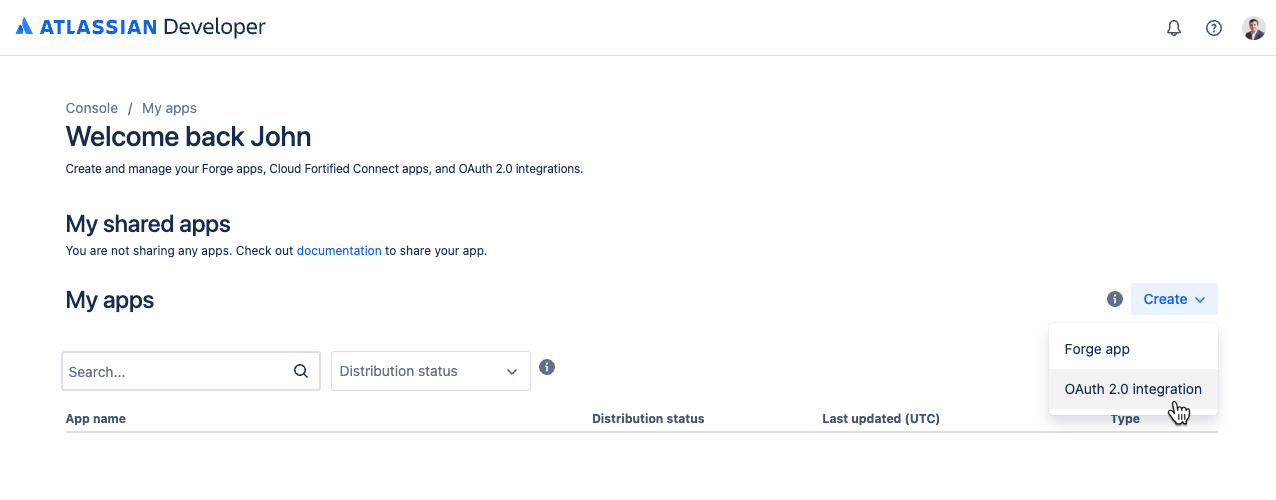
1. On the **My apps** page, click **Create** and select **OAuth 2.0 integration** from the drop-down menu.
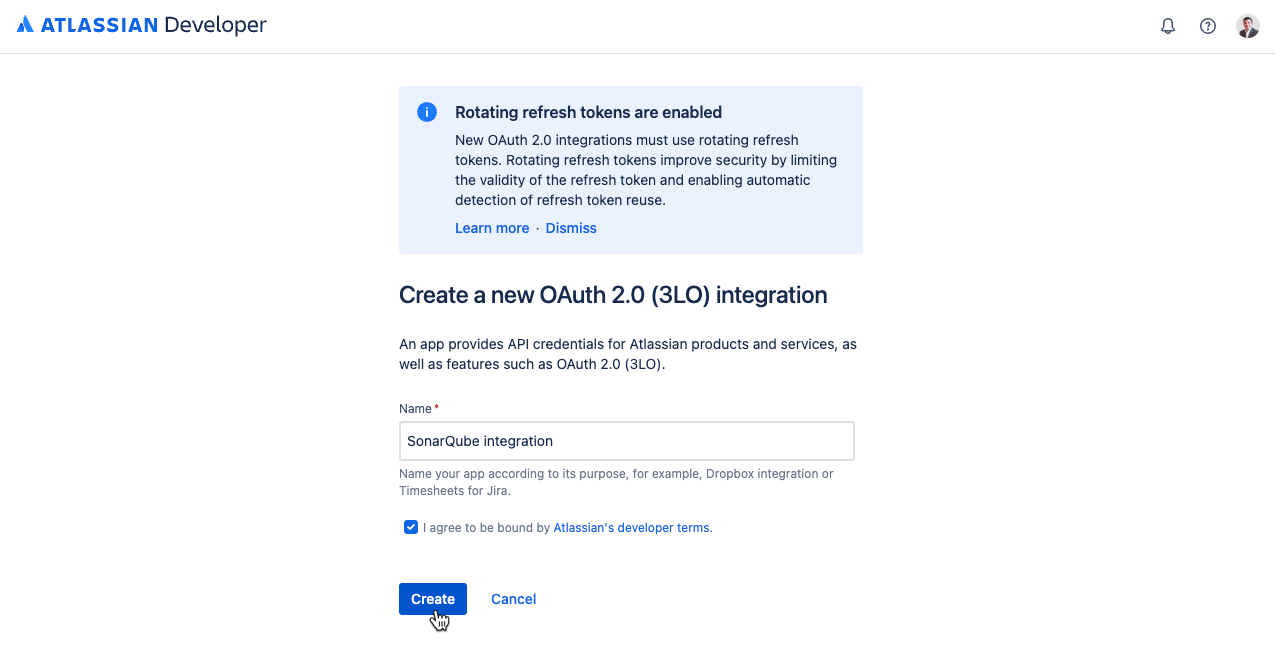
2. On the next screen, enter the **Name** of the app.
3. Read and agree to the Atlassian’s developer terms.
4. Click **Create**. The **Overview** page opens with details of the app.
{% endstep %}
{% step %}
#### Configure the permissions
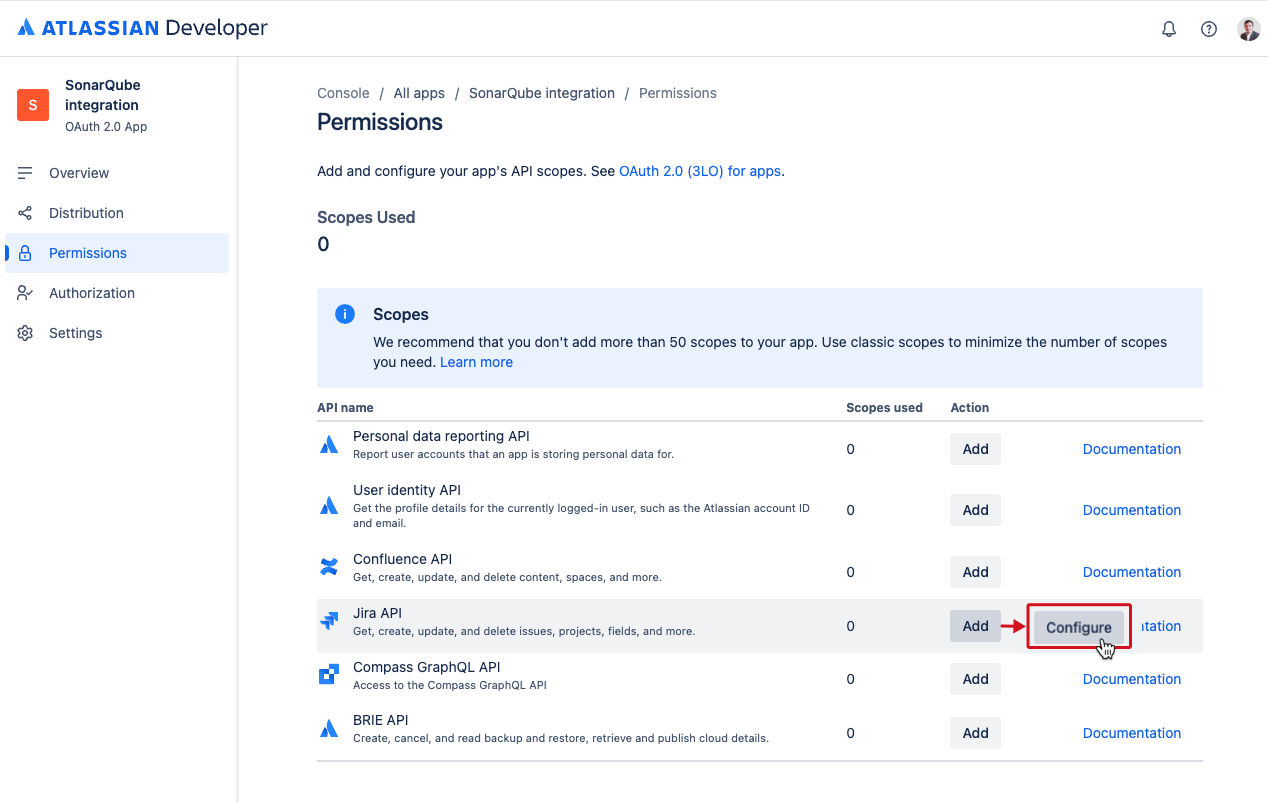
1. Select **Permissions** from the left-side navigation.
2. Navigate to **Jira API** on the list and click **Add** under the **Action** column. The button’s label changes to **Configure**.
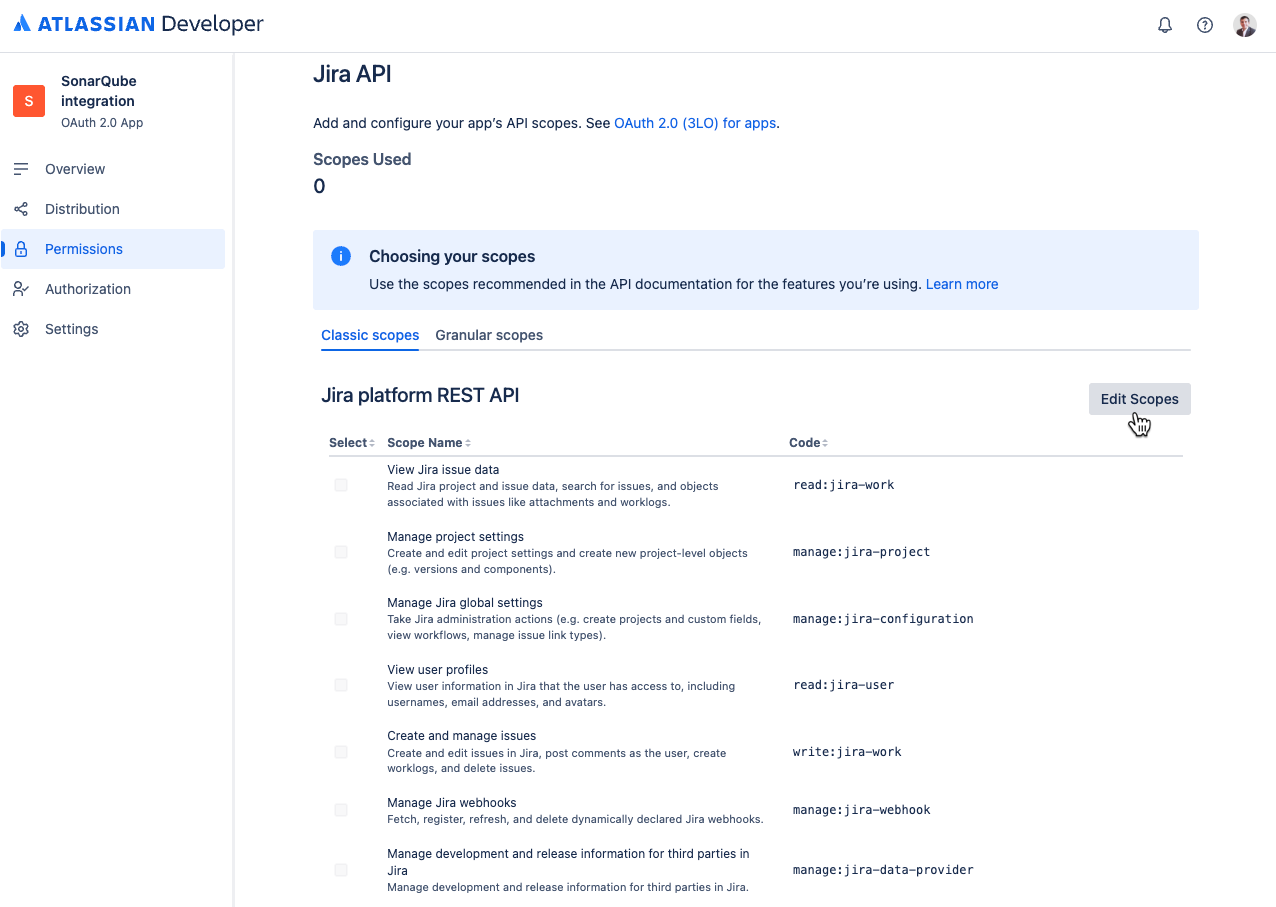
3. Click **Configure**. The **Classic scopes** tab opens.
4. Click **Edit Scopes** in the **Classic scopes** tab of the Jira platform REST API section.
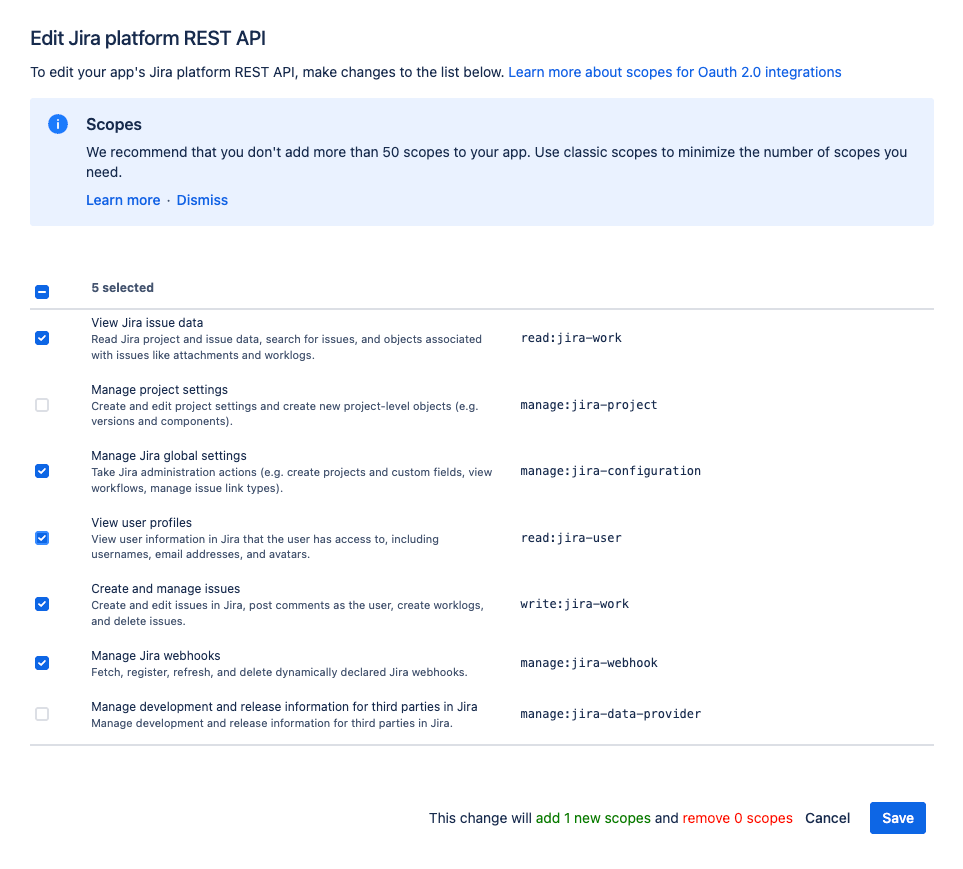
5. Select the following scopes in the modal:
* View Jira issue date
* Manage Jira global settings
* View user profiles
* Create and manage issues
* Manage Jira webhooks
6. Click **Save**.
{% endstep %}
{% step %}
#### Configure the authorization
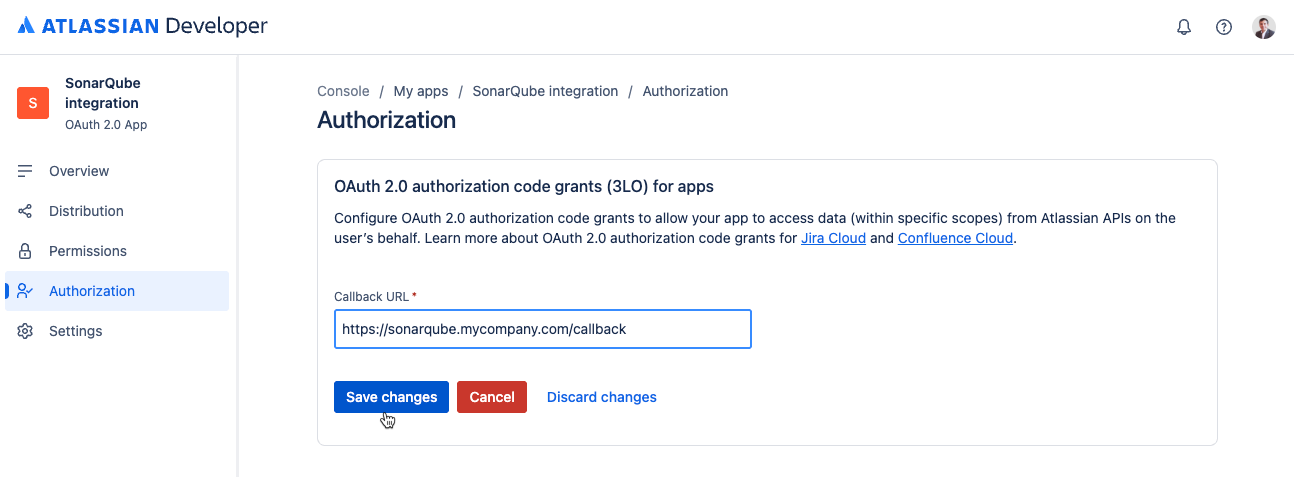
1. Select **Authorization** from the left-side navigation.
2. Navigate to your authorization entry and click on **Add**.
3. On the authorization page enter the **Callback URL**. This URL is constructed based on the SonarQube Server's base URL by adding `/callback` to the end of the URL (for information about the prerequisites for the server base URL, see [#server-base-url](#server-base-url "mention") above). For example, if the Server base URL is `https://sonarqube.mycompany.com` then the callback URL should be `https://sonarqube.mycompany.com/callback`.
4. Click **Save changes**.
{% endstep %}
{% step %}
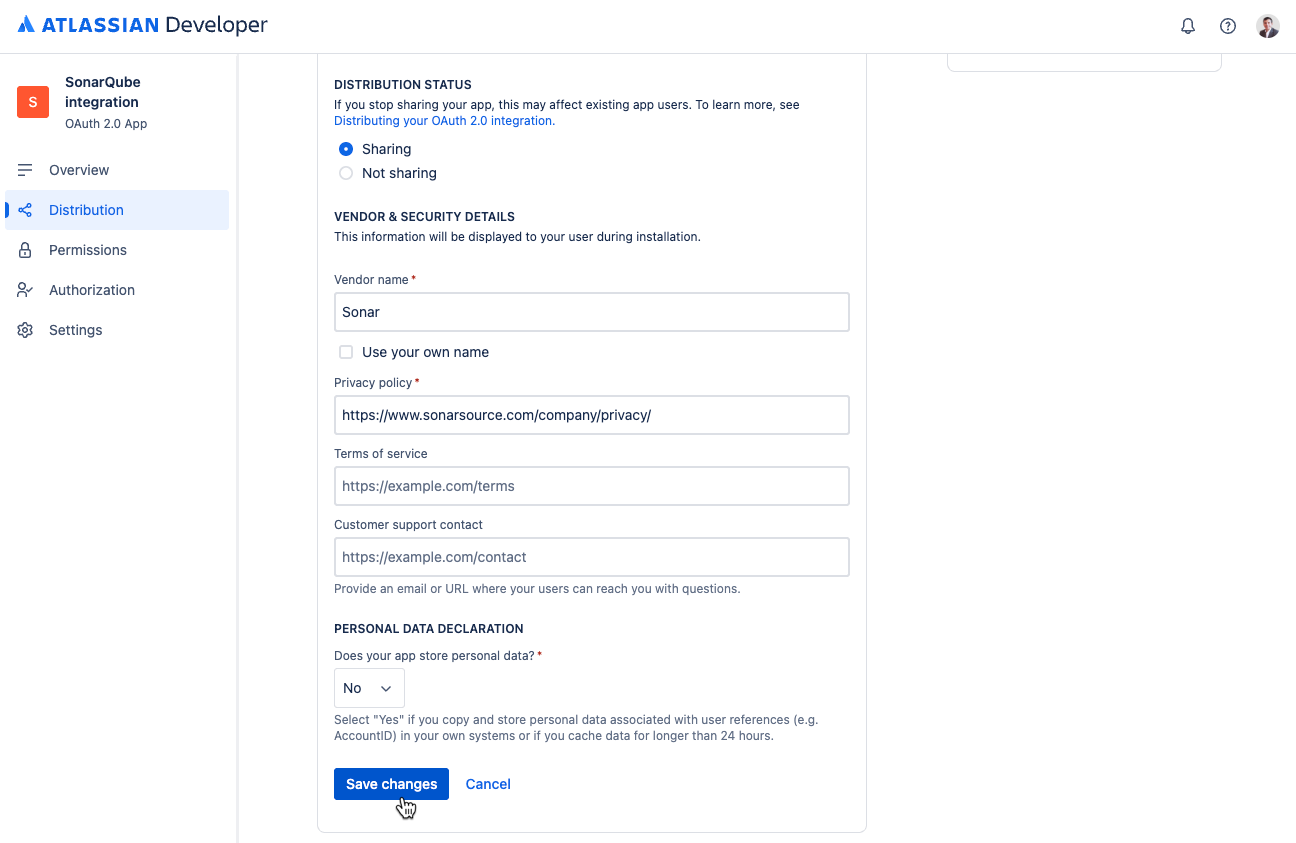
#### Change the distribution status
1. Select **Distribution** from the left-side navigation.
2. Click **Edit** to change the distribution status of the app.
3. Change the distribution status to **Sharing**.
4. In the **Vendor & security details** section enter the following information:
* **Name**: SonarSource
* **Privacy policy**: `https://www.sonarsource.com/company/privacy/`
* **Personal data declaration** > **Does your app store personal data?** Select **No.**
5. Click **Save change**.
{% endstep %}
{% step %}
#### Retrieve the authentication details
1. Select **Settings** from the left-side navigation.
2. Scroll down to **Authentication details** and copy the **Client ID** and **Secret**. You will use this information in SonarQube Server to bind your instance with Jira Cloud in the next step.
{% endstep %}
{% endstepper %}
## Binding steps in SonarQube Server
To bind your SonarQube Server instance with Jira Cloud go to **Administration** > **Configuration** > **General Settings** > **Integrations** > **Jira**.
1. Enter the **Client ID** and **Secret** you copied from the Atlassian app’s Authentication details. See the [#pre-binding-steps-in-atlassian](#pre-binding-steps-in-atlassian "mention") on how to retrieve your Client ID and Secret.
2. Click **Connect**.
3. **Grant project administrators binding permissions** enables project administrators to bind their projects to any Jira project that the Sonar organization admin token can access. This means that project administrators in SonarQube might see Jira projects and create Jira work items in projects for which they lack permissions in Jira Cloud.
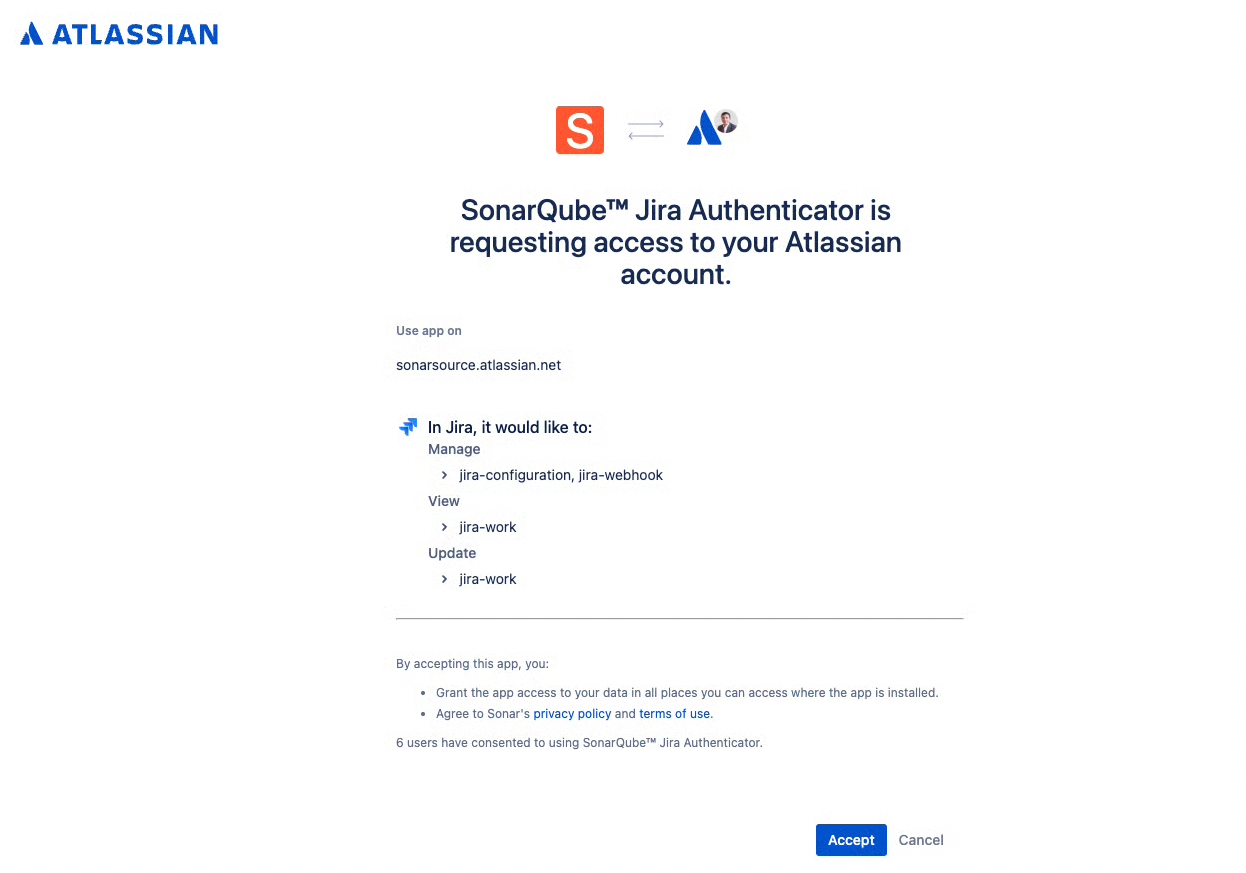
4. You will be redirected to the Atlassian authorization page for 3rd party vendors. Follow the instructions and if you have multiple Jira Cloud instances, make sure to select the right instance.
5. Click **Accept** to authorize the connection.
6. Once you are redirected back to SonarQube Server you will see a **Connected** badge displayed next to Jira along with information about when the connection was established, and with options to reauthorize and delete the connection.
{% hint style="info" %}
The administrator who connects a SonarQube Server instance to a Jira Cloud instance becomes the default reporter for all Jira work items created.
{% endhint %}
After the connection is established you can bind your SonarQube Server projects with Jira projects. See [jira-integration](https://docs.sonarsource.com/sonarqube-server/project-administration/jira-integration "mention") on the project level for more information.
## Reauthorizing the connection to Jira Cloud
Reauthorizing your SonarQube Server instance is non-destructive, which means that connections to all projects and issues will remain intact.
{% hint style="info" %}
When reauthorizing, always ensure you select the same Jira Cloud instance on the Atlassian authorization page to avoid potential errors. See [#troubleshooting](#troubleshooting "mention") for more information.
{% endhint %}
In the unlikely event that your SonarQube Server instance doesn’t use any features of the Jira integration for three months (for example, if there are no projects connected to Jira Cloud), the connection to Jira Cloud will expire and will need to be re-authenticated by the system administrator.
## Deleting the connection with Jira Cloud
Deleting your instance’s connection with Jira removes all bindings between SonarQube and Jira Cloud, as well as related data in the SonarQube Server. To completely remove the connection, you must revoke relevant token permissions in the Atlassian account.
By deleting the SonarQube to Jira Cloud connection, you will:
* Lose access to all Jira features in this SonarQube Server instance.
* Delete this instance’s project to Jira Cloud project connections.
* Disconnect all SonarQube issues from Jira work items.
{% hint style="warning" %}
You will not be able to restore this data after reconnecting the SonarQube Server instance.
{% endhint %}
## Binding your project with Jira Cloud
See [jira-integration](https://docs.sonarsource.com/sonarqube-server/project-administration/jira-integration "mention") on a project level for more details.
## Troubleshooting
The following are the typical errors that might prompt you to troubleshoot the connection with Jira Cloud:
* When setting up an OAuth (3LO) integration app in the Atlassian developer console, you get an error stating that *The app’s callback URL is invalid. (...)*\
**Solution**: Make sure the **Server based URL** configured in SonarQube Server is the same as the one used in **Callback URL** in the app’s **Authorization** settings. See step [4: Configuring the authorization](#configure-the-authorization) for more details.
* The administrator who set up the connection has left the company and the Atlassian token has been removed.\
**Solution**: The new administrator has to reauthorize the Jira Cloud connection. See Reauthorizing the connection with Jira Cloud for more information.
* The connection has been reauthorized with a wrong Jira Cloud instance.\
**Solution**: Make sure to select the correct Jira cloud instance on the Atlassian authorization page when reauthorizing the connection. SonarQube Server remembers previous issue-to-Jira work item connections on the project levels, but the SonarQube instance has to be reauthorized to the original Jira Cloud instance for these connections to be available again. See [#reauthorizing-the-connection-to-jira-cloud](#reauthorizing-the-connection-to-jira-cloud "mention") for more information.
* The **Connect** button is grayed out on the project settings page for Jira, preventing you from binding your Sonar project with a Jira project, or the **Edit** and **Delete** buttons are grayed out on an existing SonarQube-to-Jira connection.\
**Solution**: Make sure the System Administrator turns on the toggle for **Grant project administrators binding permissions** on the Jira administration page for the SonarQube Server instance. See [#binding-steps-in-sonarqube-server](#binding-steps-in-sonarqube-server "mention") for more information.
* The **Push to Jira** button is not visible on the SonarQube issue page.\
**Solution**: After connecting your SonarQube instance to a Jira Cloud instance you need to bind individual SonarQube projects to Jira projects. See [jira-integration](https://docs.sonarsource.com/sonarqube-server/project-administration/jira-integration "mention") on a project level for more information.
## Related pages
* [jira-integration](https://docs.sonarsource.com/sonarqube-server/project-administration/jira-integration "mention") on a project level
* [managing-jira-work-items](https://docs.sonarsource.com/sonarqube-server/user-guide/issues/managing-jira-work-items "mention")
.png)