Managing GitLab automatic provisioning
On this page
You can enable the automatic user and group provisioning and benefit from:
- Automatic user and group provisioning and de-provisioning.
- Automatic synchronization of users’ group memberships.
- Automatic synchronization of user permissions on projects.
- Automatic project visibility synchronization.
For more information, see Automatic provisioning mode.
With the automatic provisioning mode, the actions you can perform on local users are restricted (The local users are all the users who are not managed by the automatic provisioning process.): see Limitations in Automatic provisioning mode.
The automatic provisioning process does not synchronize the global permissions. You must still set them manually. See Setting the global permissions in Managing user permissions.
Enabling the automatic provisioning
You can enable the automatic provisioning mode once you’ve set up the GitLab authentication and provisioning (The automatic mode is disabled by default.).
- The first user and group provisioning run happens immediately when you enable the feature.
- During the first synchronization, existing manually added group memberships and permissions of auto-provisioned accounts are reset in SonarQube.
To enable the automatic provisioning mode:
1. In GitLab, create the GitLab token that will be used by SonarQube Server to access and synchronize with the GitLab server. You can use either a group or a personal access token, as long as it has visibility on the allowed GitLab groups (see Setting the allowed GitLab groups below) . The token's scope must include read_api.
2. In SonarQube Server, go to Administration > Configuration > General Settings > Authentication > GitLab.
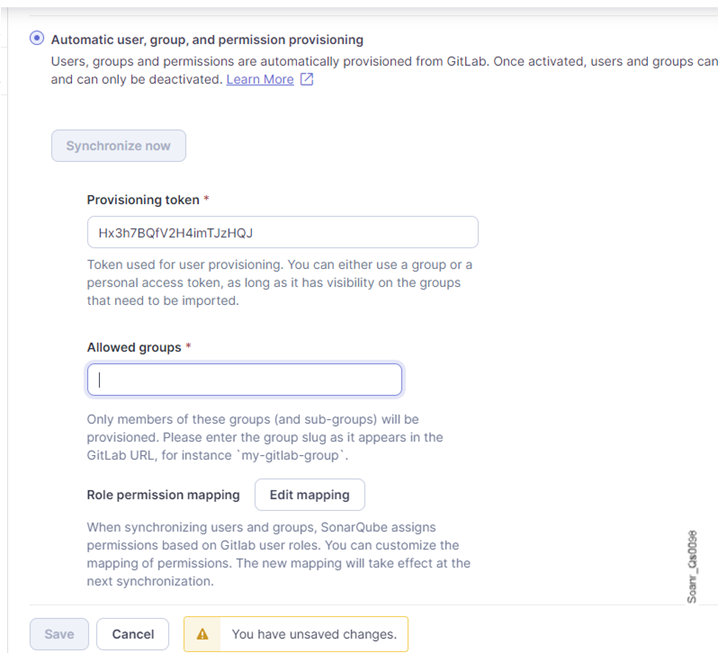
3. In the Provisioning section, select Automatic user, group, and permission provisioning.
4. In Provisioning token, enter the GitLab token created in the first step.

5. In Allowed groups, enter the GitLab root groups (groups with no parent) to be provisioned in SonarQube Server: see below.
6. If you want to change the role permission mapping, select the Edit mapping button in Role permission mapping. See Editing the role permission mapping below.
Setting the allowed GitLab groups
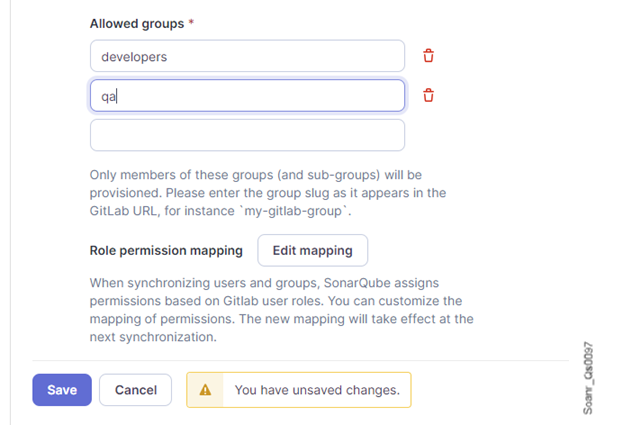
When using the GitLab automatic provisioning mode in SonarQube Server, you must define which GitLab root groups (groups with no parent) will be provisioned: only members of these Allowed groups and all their subgroups will be provisioned. For more information, see User and group provisioning in GitLab automatic provisioning mode.
To set or change the allowed GitLab groups:
- Go to Administration > Configuration > General Settings > Authentication > GitLab.
- In Automatic user and group provisioning > Allowed groups, enter the root group slug as it appears in the GitLab URL. For instance, if the first group URL is
https://gitlab.com/my-root-group, then entermy-root-group. A new text box is added underneath. - Enter the second root group slug, etc.

Editing the role permission mapping
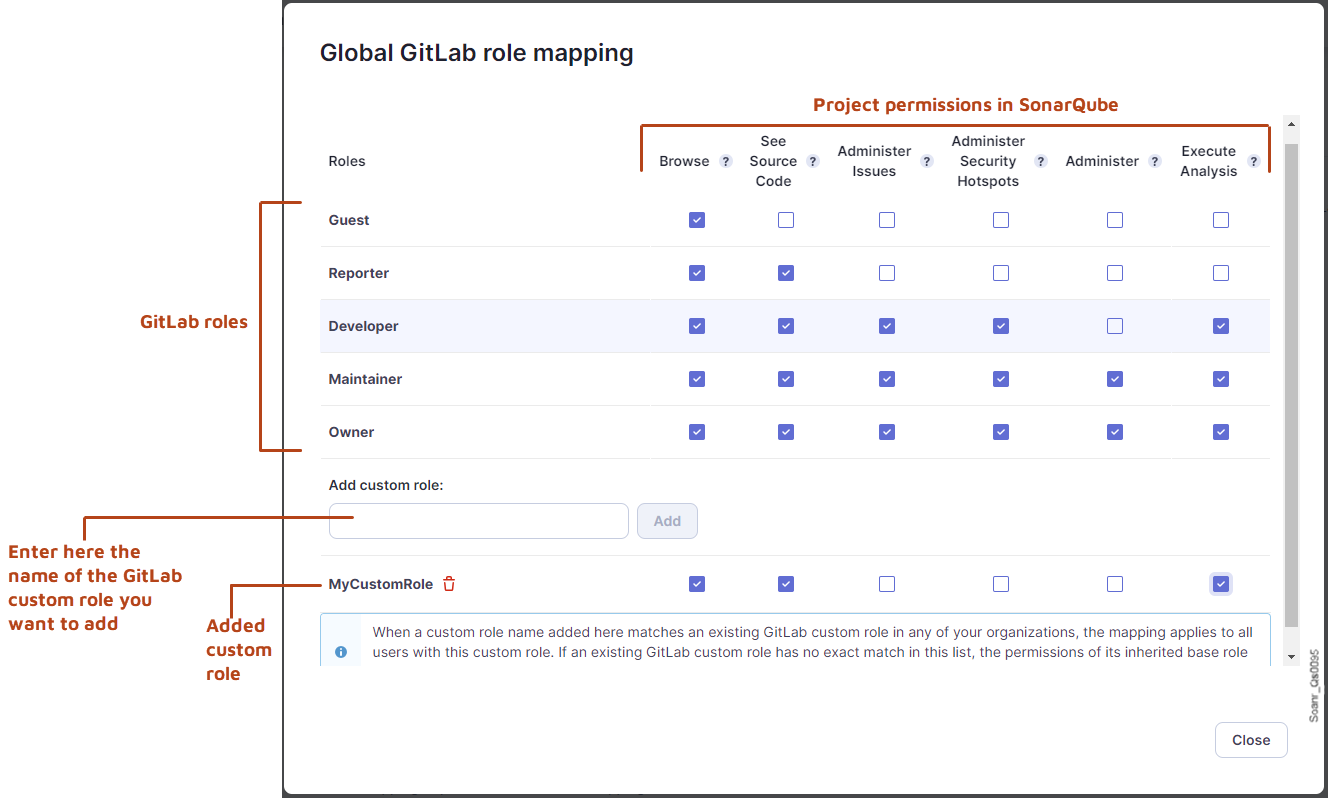
SonarQube Server synchronizes the project permissions of auto-provisioned users based on the configured role permission mapping. You can change the mapping provided by default, and if you use custom rules in GitLab, you can configure their mapping to SonarQube Server project permissions. For more information, see Project permissions synchronization in Automatic provisioning mode.
To edit the mapping of GitLab roles with SonarQube Server permissions:
- Go to Administration > Configuration > General Settings > Authentication > GitLab.
- In Provisioning > Role permission mapping, select Edit mapping. The Global GitLab role mapping dialog opens.
- Select or unselect a checkbox to modify the permissions of the different roles.
- To add a custom role:
- In the Add custom role section, enter the exact name of the custom role.
- Select Add. The custom role is added below the section.
- Configure the permissions of the custom role.
- To remove a custom role, select the dustbin icon near the custom role name.
- Select Close. The dialog closes and the changes are saved.

Enabling/disabling the Just-in-Time group membership synchronization
In addition to the hourly synchronization, you can enable SonarQube Server to synchronize the group memberships of any existing auto-provisioned user at authentication time (Just-in-Time (JIT) synchronization).
To enable or disable the JIT group membership synchronization:
- Go to Administration > Configuration > General Settings > Authentication > GitLab.
- On the far right of App ID, select Edit. The Edit GitLab Configuration dialog opens.
- Select or unselect the Synchronize user groups option.
- Select Save configuration.
Monitoring the synchronization
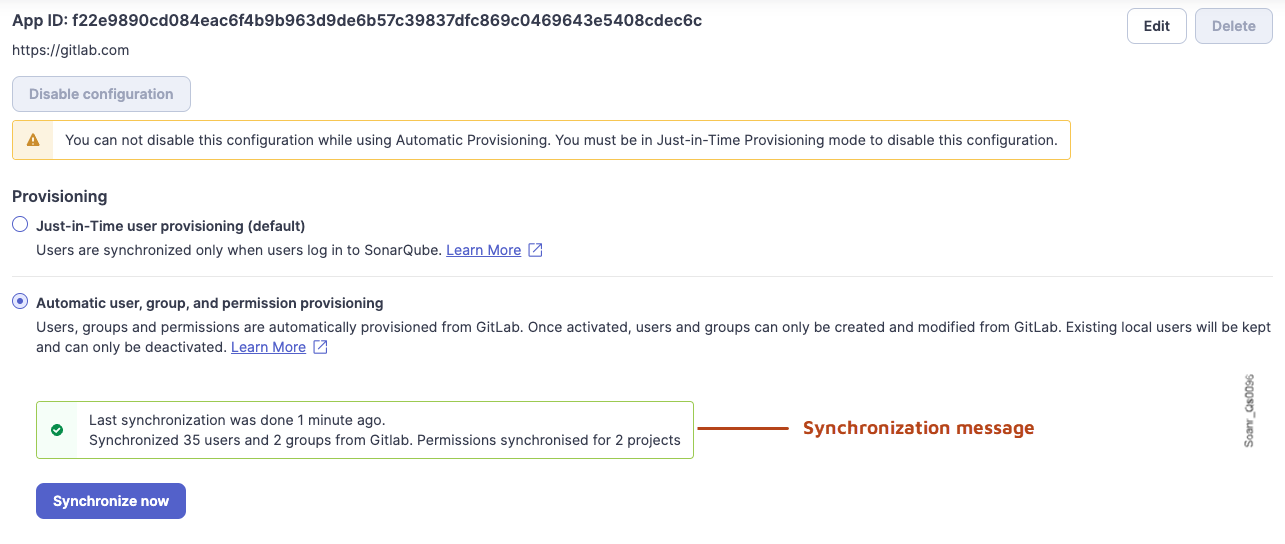
You can check the status and possible errors of the last synchronization between GitLab and SonarQube Server, with statistics on the number of users and groups synchronized from GitLab, and the number of projects for which user permissions have been synchronized.
To monitor the synchronization:
- Go to Administration > Configuration > General Settings > Authentication > GitLab. The synchronization message is shown in the Automatic user, group, and permission provisioning section. If a synchronization is in progress, “Synchronization is pending” is displayed.

Manually starting a synchronization
Synchronization is started automatically every hour. If necessary, you can start a synchronization manually. The next automatic synchronization will happen one hour after the last synchronization.
To start a synchronization:
- Go to Administration > Configuration > General Settings > Authentication > GitLab.
- In the Automatic user, group, and permission provisioning section, select the Synchronize now button.
Changing the provisioning token
- In GitLab, create the new GitLab token that will be used by SonarQube Server to access and synchronize with the GitLab server. You can use either a group or a personal access token, as long as it has visibility on the allowed GitLab groups (see Setting the allowed GitLab groups above). The token's scope must include
read_api. - In SonarQube Server, go to Administration > Configuration > General Settings > Authentication > GitLab.
- In Automatic user, group, and permission provisioning > Provisioning token, select the Update field value button.
- Copy-paste the new token.
- Select Save.
Disabling the automatic provisioning
- Go to Administration > Configuration > General Settings > Authentication > GitLab.
- In the Provisioning section, select the Just-in-time user provisioning option.
- Select the Save button.
- To manage the JIT provisioning mode, see Managing JIT provisioning mode.
Related pages
Was this page helpful?