Installing Data Center Edition from the ZIP file
Don't start this journey alone! As a Data Center Edition subscriber, SonarSource will assist with the setup and configuration of your cluster. Get in touch with Sonar Support for help.
Prerequisites
You have:
- Prepared the cluster environment by setting up the network and provisioning the nodes and load balancer. See DCE installation requirements and recommendations.
- Performed the pre-installation steps. See DCE pre-installation steps.
- Installed your database. See Installing the database.
Step 1: Install an application node and create your ZIP installation package
1. On a single application node of the cluster, download and install SonarQube Server DCE:
- Download the distribution.
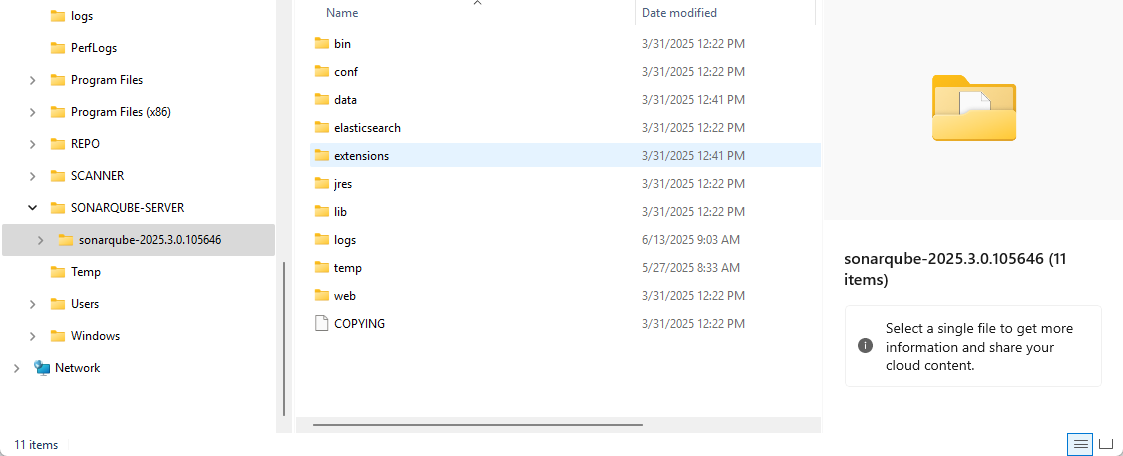
- Unzip the downloaded ZIP file into the directory you want to use to install your SonarQube (except a directory starting with a digit). The figure below shows this directory. It is called
<sonarqubeHome>in this documentation.

2. Perform the basic setup:
- Set access to the database.
- If using Oracle, add the JDBC driver.
- Set the web server connection parameters.
3. Add the cluster-related parameters to <sonarqubeHome>/conf/sonar.properties. See Sample configuration below.
4. You can perform advanced setup. In particular, store the JWT token to keep the user sessions alive on server restart. This is also a good opportunity to install plugins.
5. Zip the directory <sonarqubeHome>. This archive is a customized SonarQube Server DCE package that can be copied to other nodes.
Step 2: Test your node installation
- On the application node where you created your ZIP package, comment out all cluster-related parameters in
<sonarqubeHome>/conf/sonar.properties. - Configure the load balancer to proxy with single application node.
- Start the node and test access through load balancer.
- Request license from SonarSource Sales Team.
- After applying license, you will have a full-featured SonarQube Server system operating on a single node.
Step 3: Deploy your ZIP package on other nodes
- Unzip SonarQube Server package on the other nodes.
- Complete the basic setup:
- On the application nodes:
- Set access to the database.
- If using Oracle, add the JDBC driver.
- Set the web server connection parameters.
- On the search nodes:
- Configure the Elasticsearch storage path.
- On the application nodes:
- Configure node-specific parameters in
<sonarqubeHome>/conf/sonar.propertieson all search and application nodes. Make sure the cluster-related parameters are properly set. - You can perform advanced setup:
- On all nodes:
- Adjust java executable path.
- Enable IPv6.
- On the application nodes:
- Self-signed certificates.
- Change DNS cache TTL.
- Store JWT token in order to keep user sessions alive on server restart.
- On all nodes:
- Start all search nodes. See Starting SonarQube Server from the ZIP file.
- After all search nodes are running, start all application nodes.
- Configure the load balancer to proxy with all application nodes.
Once SonarQube Server UI is up, you can encrypt sensitive properties stored in <sonarqubeHome>/conf/sonar.properties. See Encrypting sensitive settings.
Sample Configuration
The following example represents a sample configuration of a SonarQube Server Data Center Edition's sonar.properties file. The example assumes:
- The VMs having IP addresses ip1 and ip2 (server1, server2) are application nodes
- The VMs having IP addresses ip3, ip4, and ip5 (server3, server4 and server5) are search nodes
In the example, the hosts followed by ports are written using the IPv4 notation (e.g. ip3:9001). If you use IPv6 addresses, enclose the IP address in square brackets ([ip3]:9001).
The system properties indicated below are described in the General section of the list of system properties specific to the Data Center Edition.
The configuration to be added to sonar.properties for each node is the following:
Application nodes
server1:
...
sonar.cluster.enabled=true
sonar.cluster.node.type=application
sonar.cluster.node.host=ip1
sonar.cluster.node.port=9003
sonar.cluster.hosts=ip1,ip2
sonar.cluster.search.hosts=ip3:9001,ip4:9001,ip5:9001
sonar.auth.jwtBase64Hs256Secret=YOURGENERATEDSECRET
...server2
...
sonar.cluster.enabled=true
sonar.cluster.node.type=application
sonar.cluster.node.host=ip2
sonar.cluster.node.port=9003
sonar.cluster.hosts=ip1,ip2
sonar.cluster.search.hosts=ip3:9001,ip4:9001,ip5:9001
sonar.auth.jwtBase64Hs256Secret=YOURGENERATEDSECRET
...
Search nodes
server3
...
sonar.cluster.enabled=true
sonar.cluster.node.type=search
sonar.cluster.node.search.host=ip3
sonar.cluster.node.search.port=9001
sonar.cluster.node.es.host=ip3
sonar.cluster.node.es.port=9002
sonar.cluster.es.hosts=ip3:9002,ip4:9002,ip5:9002
...
server4
...
sonar.cluster.enabled=true
sonar.cluster.node.type=search
sonar.cluster.node.search.host=ip4
sonar.cluster.node.search.port=9001
sonar.cluster.node.es.host=ip4
sonar.cluster.node.es.port=9002
sonar.cluster.es.hosts=ip3:9002,ip4:9002,ip5:9002
...
server5
...
sonar.cluster.enabled=true
sonar.cluster.node.type=search
sonar.cluster.node.search.host=ip5
sonar.cluster.node.search.port=9001
sonar.cluster.node.es.host=ip5
sonar.cluster.node.es.port=9002
sonar.cluster.es.hosts=ip3:9002,ip4:9002,ip5:9002
...
Related pages
- Cluster topology
- Data Center Edition installation requirements
- Pre-installation steps
- Installing DCE on Kubernetes or Openshift
- Configuring network security features:
- Starting and stopping the cluster
Was this page helpful?
© 2008-2025 SonarSource SA. All rights reserved.