For the complete documentation index, see llms.txt. This page is also available as Markdown.

Setting your project's permissions

This page explains your SonarQube Cloud project permission options, how to update or reset permissions, and information about changing a project’s visibility setting.

As a project admin, you can update your project’s permissions manually or, with a Team or Enterprise plan organization, reset the default permissions and apply a permission template defined by the organization administrator.

If you are an organization admin, you can:

Permissions related to a project

The following permissions are available for a project:

Permission Type
Description

Administer

On private projects, the Browse project permission must also be granted. The project administrator can access project settings and perform administration functions, including the following permission-related functions:

  • Management of the project’s user and group permissions.

  • Project's visibility (public, private).

Execute analysis

Grants the ability to:

  • Retrieve all settings required to run the analysis, including secured credentials like passwords

  • Push analysis results to SonarQube Cloud

Note: Users with the Execute Analysis permission at the organization-level are able to scan projects, even if they don’t have any explicit project permissions.

Administer security hotspots

Can change the status of a security hotspot. For private projects, the Browse project permission must also be granted.

Administer issues

Can perform the following actions:

  • Accept an issue

  • Mark an issue as False positive

See source code (private projects)

Grants the ability to view the source code (via API and web view) provided the Browse project permission is also granted.

Note: Anonymous and unauthorized users are prevented from easily downloading public projects’ source code via API and web views.

Browse (private projects)

Can view a project.

Updating the permissions of your project

To update the permissions of your project:

  1. Retrieve your project. See Retrieving projects for more details.

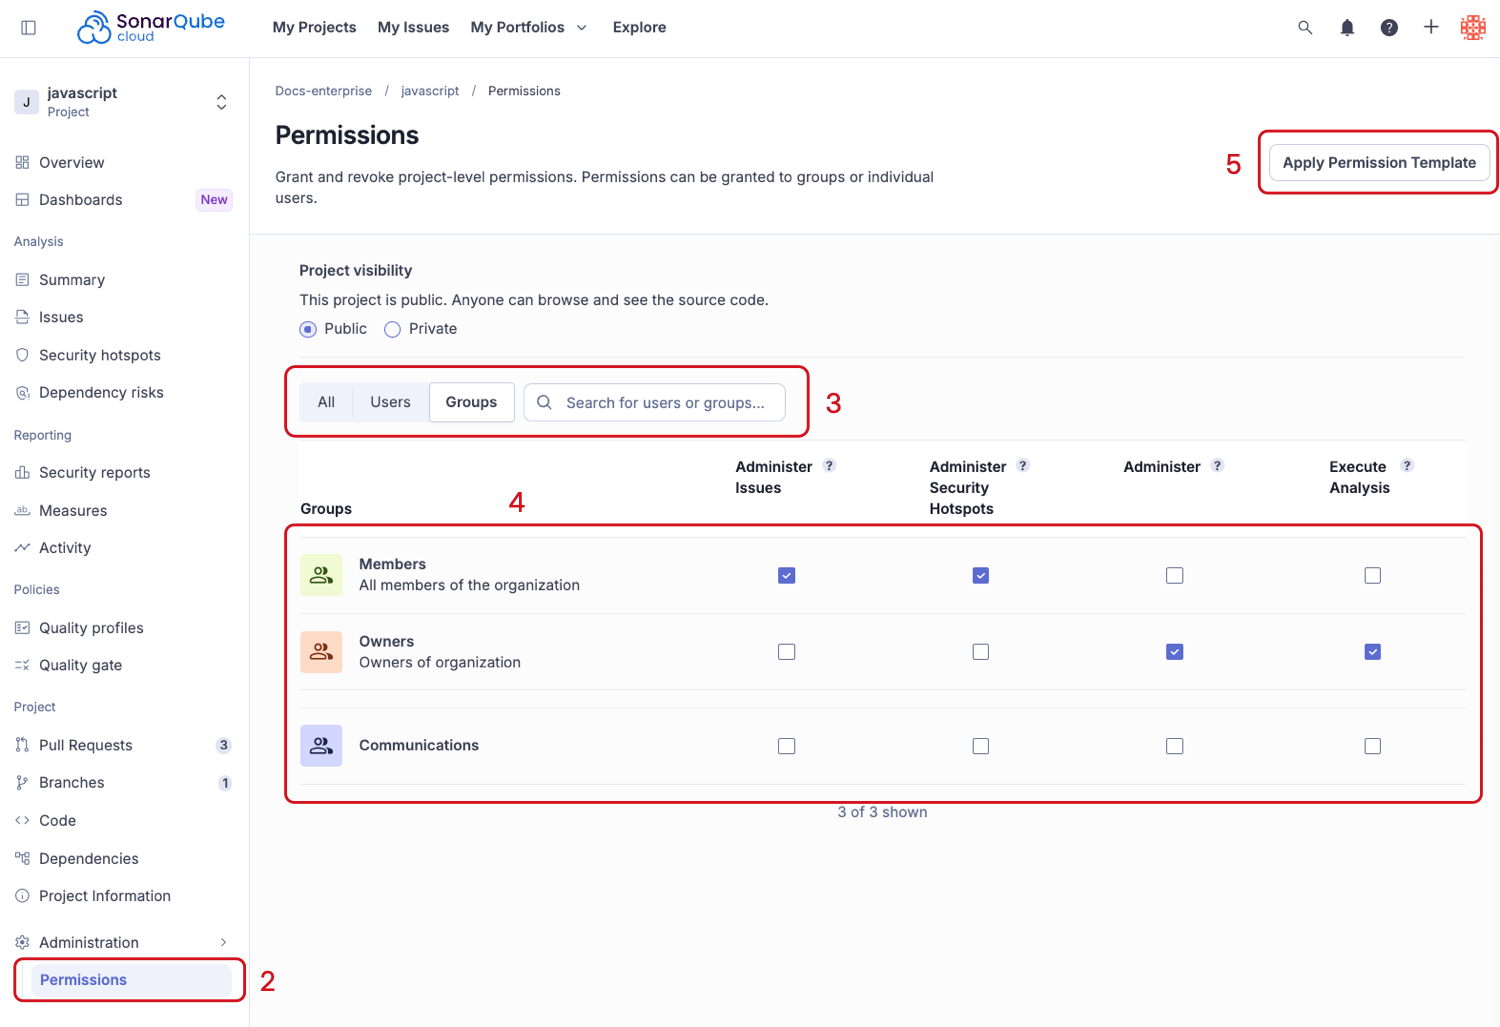
  2. Go to Administration > Permissions. The Permissions page opens.

  3. Filter the page by Users or Groups, or search for a specific user or group.

  4. Select the check boxes to change the permissions.

  5. Click Apply Permission Template to apply a predefined set of permissions to your project. See Applying a permission template to projects for more information.

Changing the project’s visibility

The project’s visibility may be:

  • Public: Anyone, including anonymous users, can view public projects. A public project may be part of any organization.

  • Or private: Only authorized users, who are members of the organization, can view a private project. By default, the visibility of newly created projects is set to private on Free, Team and Enterprise plans.

If you’re a project admin, you can change your project’s visibility.

To change the visibility of your project:

  1. Retrieve your project. See Retrieving projects for more details.

  2. Go to Administration > Permissions. The Permissions page opens.

  3. In the Project visibility section, select the Public or Private checkbox. (You can also upgrade your organization from this section.) The Turn to Private / Public dialog opens.

  4. Confirm the change.

Last updated

Was this helpful?