SCIM with Microsoft Entra ID
Enable SCIM to automate user and group provisioning from Microsoft Entra ID to SonarQube Server.
Automatic provisioning through SCIM is available starting in Enterprise Edition.
You can enable SCIM to automate user and group provisioning from Microsoft Entra ID (previously known as Azure AD) to SonarQube Server. For an overall understanding of the feature, see the SCIM overview page.
Prerequisites
You have a working SAML configuration. See Introduction to SAML with Microsoft Entra ID.
The connection from the Identity Provider to SonarQube must not be blocked on the network (unlike SAML, SCIM requires a direct network connection from the Identity Provider to SonarQube).
Configuring SonarQube Server
1. Within SonarQube Server, go to Administration > Authentication > SAML.
2. Under Provisioning, click Automatic user and group provisioning with SCIM.
3. Click Save and validate the pop-up window if you are sure you want to enable SCIM.
SCIM is now enabled in SonarQube Server, it will handle all the queries coming from Microsoft Entra ID about users and groups.
Configuring Microsoft Entra ID
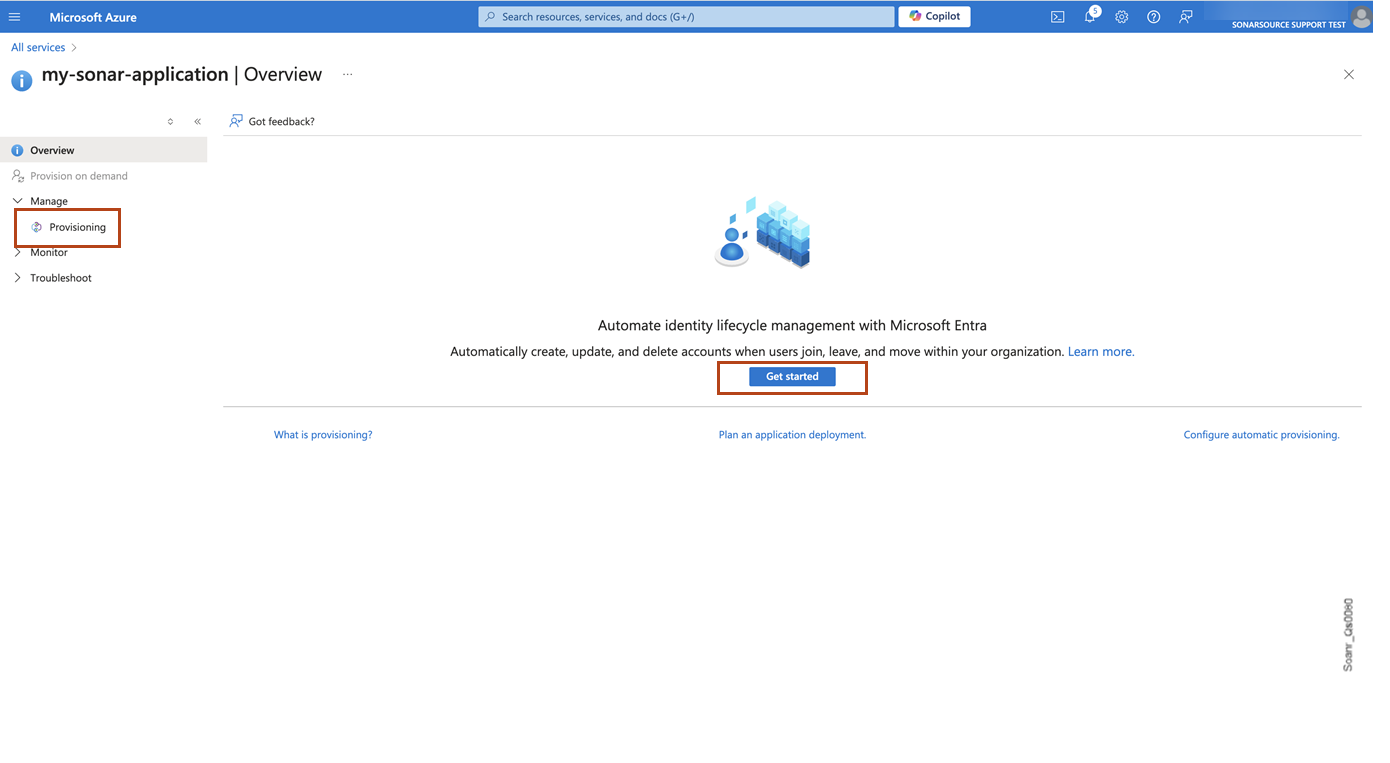
In Microsoft Entra ID, go to Identity > Applications > Enterprise applications > All applications and select the application created for SonarQube Server. On the application’s page, select Provisioning.

On the Provisioning page, click Get started.
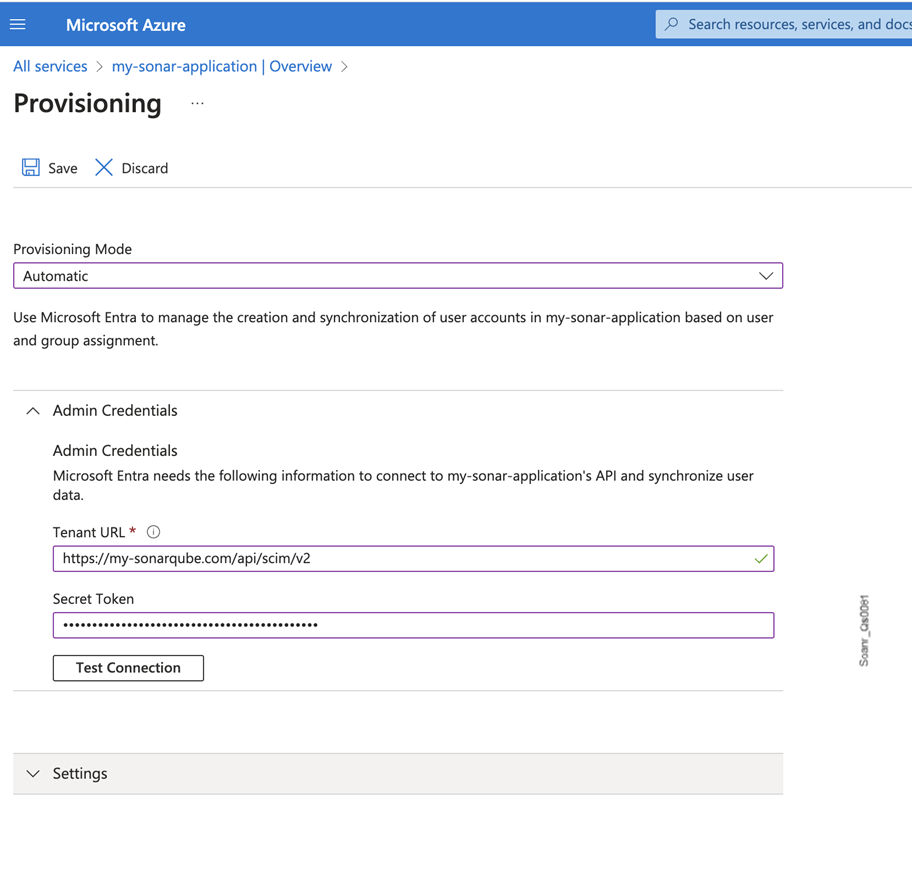
Under Provisioning Mode, select Automatic.
Configure the Admin Credentials section as follows:
Tenant Url:
<sqServerBaseUrl>/api/scim/v2Secret token: Paste a SonarQube Server's user-type token, see Managing your tokens, for an admin account in this field. For safety reasons, we recommend using a token from a local admin account (not managed through SCIM).

Click Test Connection to check that your credentials are valid, then click Save.
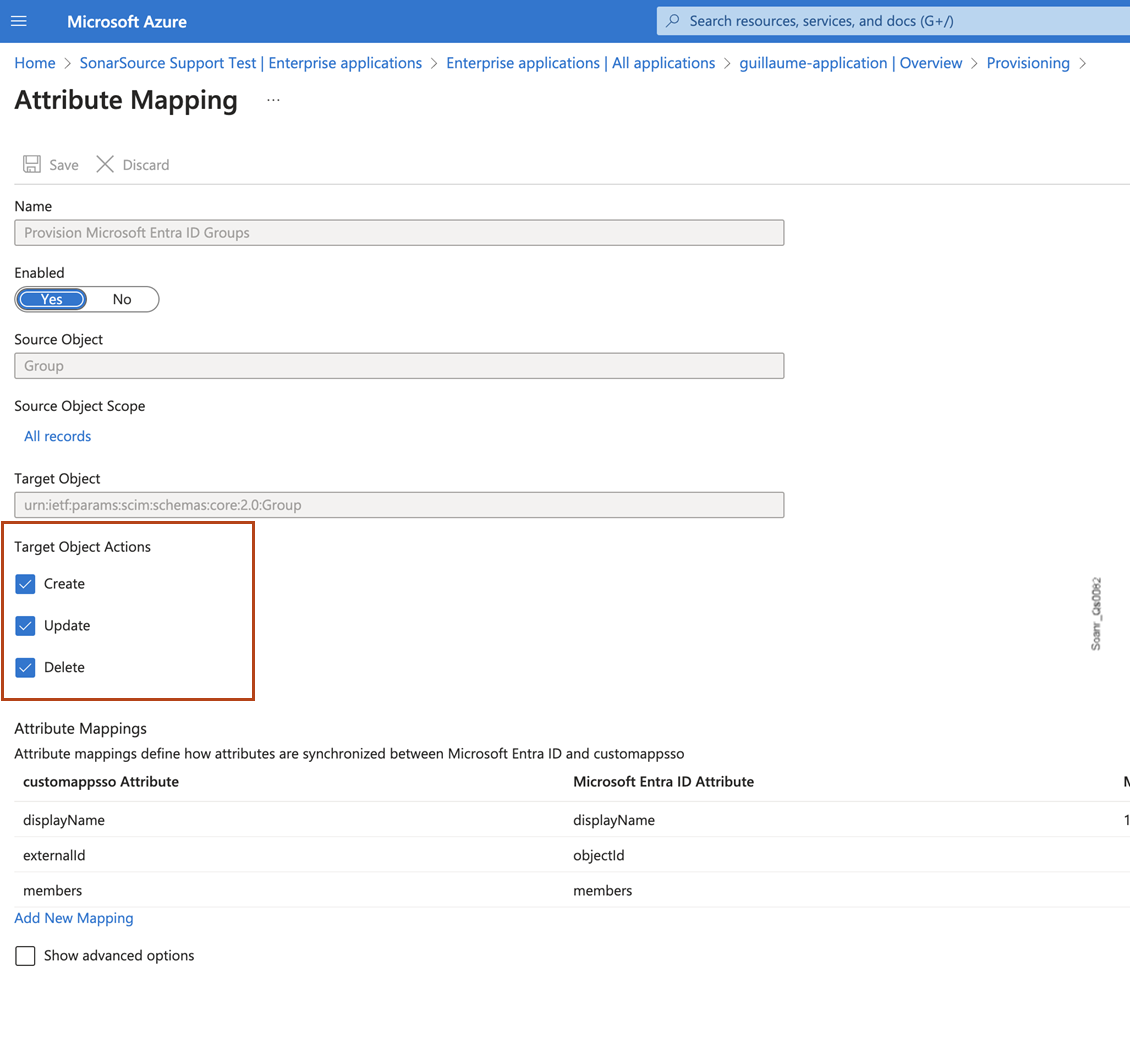
Under Mappings, click on Provision Microsoft Entra ID Groups. This opens the Attribute Mapping dialog for groups.
Under Target Object Actions, make sure that Create, Update, and Delete are enabled.

In Attribute Mappings, make sure
displayNameappears in both columns of the mapping. This ensures groups are mapped based on their names.

Click Save. This takes you back to the Provisioning page. If this was the default configuration, go back to the previous page.
Under Mappings, click on Provision Microsoft Entra ID Users. This opens the Attribute Mapping dialog for users.
Under Target Object Actions, make sure that Create, Update, and Delete are enabled.
In Attribute Mappings , map the
userNamecustomappsso Attribute (target) to the Microsoft Entra ID Attribute (source) used as SAML user login attribute in your SAML configuration. For example, if your login attribute ishttp://schemas.xmlsoap.org/ws/2005/05/identity/claims/emailaddressin your SonarQube Server’s SAML configuration and it is mapped touser.userprincipalname(default), useuserprincipalnamehere. Otherwise, if it is mapped touser.mail, then usemailinstead.

To check which Microsoft Entra ID attribute is used as SAML user login attribute:
In SonarQube, go to Administration > Authentication > SAML.
In SAML Configuration > SAML, select Edit. The MS Entra ID attribute is the value of SAML user login attribute.
Click Save. This takes you back to the Provisioning page.
In the Settings > Scope section, select Sync only assigned users and groups.

Set the provisioning status to On and click Save. The Microsoft Entra ID users and groups will be synchronized with SonarQube Server.
Microsoft Entra ID runs a SCIM synchronization every 40 minutes. Changes in Microsoft Entra ID are not reflected immediately in SonarQube Server.
Last updated
Was this helpful?

