> For the complete documentation index, see [llms.txt](https://docs.sonarsource.com/llms.txt). Markdown versions of documentation pages are available by appending `.md` to page URLs; this page is available as [Markdown](https://docs.sonarsource.com/sonarqube-cloud/managing-your-account/managing-tokens.md).
# Managing personal access tokens
Users can manage SonarQube Cloud's personal access tokens from their My account > Access tokens page.
Each user can manage two token types in SonarQube Cloud: personal access tokens and tokens for agent apps. Token handling for the [SonarQube MCP Server](https://docs.sonarsource.com/sonarqube-developer-tools/sonarqube-mcp-server/about-the-mcp-server) depends on how you access it. Choose the token type that matches how you connect and what you want to do.
* Personal access tokens and tokens for agent apps. Personal access tokens are used to run analyses or invoke web services without using the user’s actual credentials. This token type can be used when setting up connected mode with [SonarQube for IDE](/sonarqube-cloud/analyzing-source-code/connected-mode.md), and when configuring your [AI agent with the SonarQube MCP Server](broken://spaces/NMPi6OcwuaQpPV3mp3TU/pages/JLiY6Gf0PjVWm8Dcbio9) in a local configuration. See [#personal-tokens](#personal-tokens "mention").
* Tokens for agent apps that need to access SonarQube Cloud. When you install the [SonarQube agent through GitHub agent apps](/agent-centric-development-cycle/developer-tools/agent-plugins/agent-apps-for-github.md), it uses a one-time token created for the user who starts the request. See [#agent-apps](#agent-apps "mention") for more details.
From the Team plan, Scoped Organization Tokens can be used with `sonar.token`. They support multiple permission scopes and can be configured for specific projects or organization-wide access. See the [Scoped Organization Tokens](/sonarqube-cloud/administering-sonarcloud/managing-organization/scoped-organization-tokens.md) page for more information.
> **Note:** When a user is deleted, their user access tokens are also deleted.
## Generating personal tokens
You can generate personal tokens as a replacement for your usual login:
* When running analyses on your code. Replace your login with the token in the `sonar.token` property. (Note that the property `sonar.password` is deprecated.)
* When invoking web services. See the [Web API](/sonarqube-cloud/appendices/web-api.md) page for more details.
In either case, no password is needed.
> **Note:** Tokens without an expiration date are automatically removed after 60 days of inactivity.
### Generating a personal token
> **Note:** The **Personal Tokens** tab is only available to users signed in with GitHub.
1. Open your account menu in the top right corner of the SonarQube Cloud interface.
2. In the menu, select **My account** > **Access Tokens**.
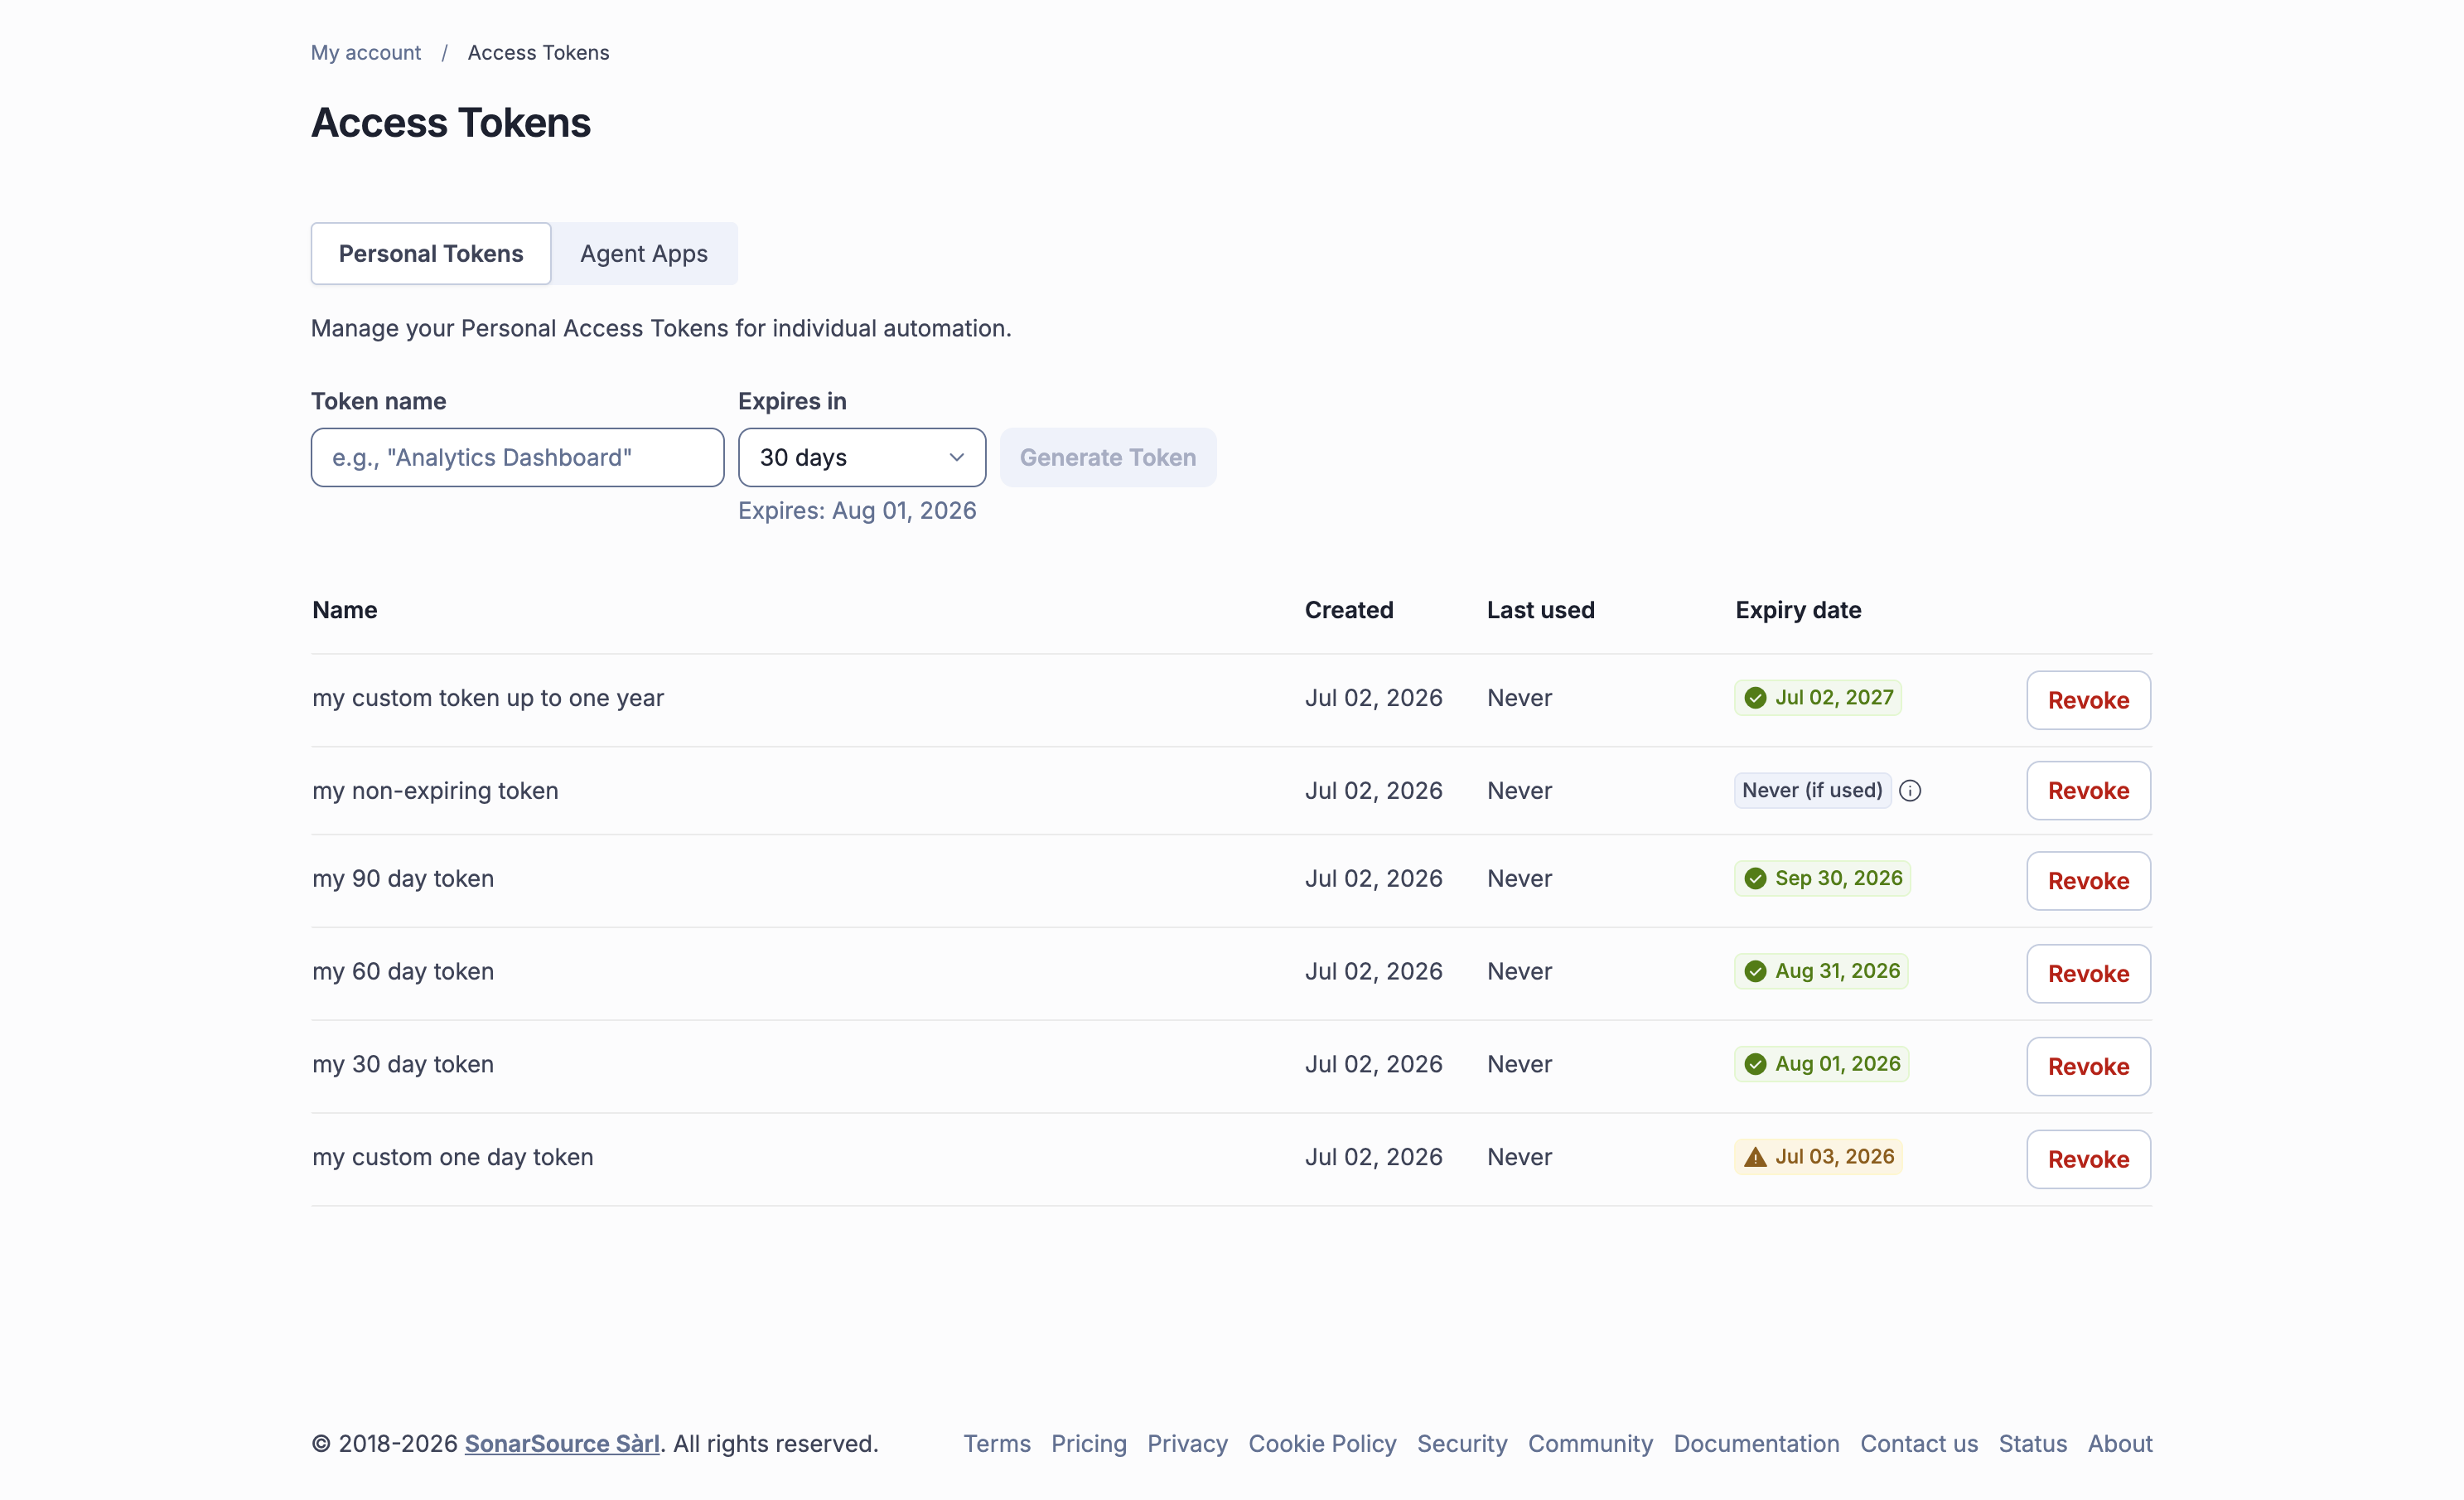
3. The **Personal Tokens** tab shows your existing personal tokens. The **Expiry date** column displays when each token expires, with a colored badge reflecting the time remaining. Tokens without an expiration date show **Never (if used)**; if the token is within 7 days of its projected inactivity removal, the removal date is shown instead.
4. In **Generate Tokens**, enter the token name and select an expiration period: **7 days**, **30 days**, **60 days**, **90 days**, or **Custom** (opens a date picker; must be between 1 day and 1 year). A helper text shows the resolved expiration date as you select.
5. Select **Generate Token**. The token value will be displayed.
6. Copy it immediately by selecting the copy tool in front of the value.
> **Warning:** If you dismiss the notification or leave the page, you will not be able to retrieve the token's value anymore.
### Revoking a personal token
1. Open your account menu in the top right corner of the SonarQube Cloud interface.
2. In the menu, navigate to **My account** > **Access tokens** > **Personal Tokens**. Your existing tokens are listed here.
3. In your list of existing tokens, select **Revoke** to remove the respective token.
## Managing tokens for agent apps
To use the [SonarQube MCP Server](https://docs.sonarsource.com/sonarqube-developer-tools/sonarqube-mcp-server/about-the-mcp-server) via agent apps, you must authorize the generation of Sonar tokens for the agent. These one-time tokens, which mirror your current SonarQube Cloud permissions, remain active until the agent task finishes or for up to one hour. You have the ability to track and revoke these tokens directly within SonarQube Cloud.
For more about using agent apps when logged in with GitHub, see the [Agent apps for GitHub](/agent-centric-development-cycle/developer-tools/agent-plugins/agent-apps-for-github.md) page.
### Enabling / disabling the token creation for agent apps
1. Open your account menu in the top right corner of the SonarQube Cloud interface.
2. In the menu, select **My account** > **Access Tokens** > **Agent Apps**.
3. Select or unselect the **Allow Agent Apps for GitHub to create personal access tokens** option.
### Tracking your Agent apps tokens
1. Open your account menu in the top right corner of the SonarQube Cloud interface.
2. In the menu, select **My account** > **Access Tokens** > **Agent Apps**.
3. In your list of existing tokens, select **Revoke** to remove the respective token.
---
# Agent Instructions
This documentation is published with GitBook. GitBook is the documentation platform designed so that both humans and AI agents can read, navigate, and reason over technical content effectively. Learn more at gitbook.com.
## Querying This Documentation
If you need additional information that is not directly available in this page, you can query the documentation dynamically by asking a question.
Perform an HTTP GET request on the current page URL with the `ask` query parameter, and the optional `goal` query parameter:
```
GET https://docs.sonarsource.com/sonarqube-cloud/managing-your-account/managing-tokens.md?ask=&goal=
```
`ask` is the immediate question: it should be specific, self-contained, and written in natural language.
`goal` is optional and describes the broader end goal you are ultimately trying to accomplish on behalf of the user. GitBook uses it to tailor the answer towards what is most useful for that goal.
The response will contain a direct answer to the question and relevant excerpts and sources from the documentation.
Use this mechanism when the answer is not explicitly present in the current page, you need clarification or additional context, or you want to retrieve related documentation sections.